Stitch Sampler Tips & Tricks – Crochet Inspiration for Blankets
Tips for Creating Crochet Stitch Sampler Blankets
Crochet stitch sampler blankets are one of the most enjoyable projects for crocheters of all skill levels. These blankets combine many different stitch patterns in a single project, allowing you to learn new techniques while creating a beautiful textured blanket.
.
This Guide Works With All Crochet Stitch Sampler Patterns
Although this guide was created to help you make the Stouto Creative Crochet Stitch Sampler Blanket, the techniques and tips can be used with almost any crochet stitch sampler pattern.
Stitch sampler projects all share many of the same challenges: working different stitches row by row, keeping the correct stitch count, reading stitch diagrams, changing colours, maintaining consistent tension and keeping the edges straight.
Whether you are making a traditional stitch sampler blanket, a temperature sampler, a scrap-yarn sampler, a sampler scarf or another project that combines multiple crochet stitches, the information in this guide can help you understand how to approach the pattern from beginning to end.
You can therefore use this tutorial as your general crochet stitch sampler help guide even if you are working from a different Stouto Creative Crochet pattern.
What Can You Learn From This Guide?
- How to choose yarn and a crochet hook.
- How to calculate and make your starting chain.
- How to work the foundation row.
- How to read crochet stitch diagrams.
- How to work different stitch patterns row by row.
- How to keep track of stitch counts.
- How to handle the beginning and end of each row.
- How to change colours between rows.
- How to work with different yarn colours and yarn balls.
- How to resize a stitch sampler blanket.
- How to identify and correct common crochet mistakes.
- How to finish, secure and weave in your yarn ends.
Tip: Use this guide alongside your individual pattern. The exact stitch counts, stitch repeats, colour sequence and construction instructions will vary from one sampler pattern to another.
This guide was created to support my stitch sampler crochet patterns and help crocheters understand how sampler blankets work. Whether you are learning new stitches, adjusting the blanket size, or choosing the best yarn, this page provides practical tips to help you crochet your project with confidence.
Crochet Stitch Sampler Blanket Guide
Everything you need to know about choosing, starting, making, resizing and finishing a crochet stitch sampler project.
- What Is a Crochet Stitch Sampler Blanket?
- How Do I Start a Crochet Stitch Sampler Project?
- What Yarn Should I Use?
- What Crochet Hook Should I Use?
- How Do I Choose the Right Crochet Hook Size?
- What Crochet Hook Size Is Used for the Stouto Stitch Sampler Blanket?
- What Happens If I Use a Smaller Crochet Hook?
- What Happens If I Use a Larger Crochet Hook?
- How Does Crochet Hook Size Affect My Blanket?
- Should I Use the Same Crochet Hook for the Whole Blanket?
- Can I Change My Hook Size When I Change Yarn?
- What If I Am Using a Different Yarn From the Pattern?
- Do I Need to Make a Gauge Swatch?
- How Does My Crochet Tension Affect Hook Choice?
- Should My Stitch Sampler Blanket Have a Tight or Loose Tension?
- What Hook Should I Use for Different Yarn Weights?
- Can I Use a Different Hook Size to Change the Blanket Size?
- What If My Blanket Is Too Small?
- What If My Blanket Is Too Large?
- Can I Use the Same Hook With Different Yarn Colours?
- What If Different Colours Feel Slightly Different?
- What Is the Best Crochet Hook for a Beginner?
- Quick Crochet Hook Checklist
- How Do I Choose My Colours?
- How Do I Change Colours?
- How Do I Add a New Ball of Yarn?
- How Do I Start a New Colour for Each Row?
- How Does Row Direction Affect Colour Changes?
- How Do I Keep My Colour Changes Neat?
- How Many Colours Should I Use?
- Can I Change My Colour Sequence?
- What If I Run Out of a Colour?
- Quick Colour-Change Checklist
- Blanket Resizing Guide
- How Do I Resize a Stitch Sampler Blanket?
- Can I Make a Stitch Sampler Blanket Bigger or Smaller?
- What Stitch Multiple Do I Need When Resizing?
- Step-by-Step Resizing Guide
- Step 1: Decide What Size Blanket You Want
- Step 2: Check the Original Pattern Dimensions
- Step 3: Check Your Stitch Multiple
- Step 4: Make a Gauge Swatch
- Step 5: Calculate Your Starting Stitch Count
- Step 6: Choose the Nearest Valid Stitch Count
- Step 7: Work the Foundation Row
- Step 8: Check the Width Before Continuing
- Step 9: Adjust the Number of Rows for the Length
- Step 10: Measure the Blanket as You Work
- How Do I Make the Blanket Wider?
- How Do I Make the Blanket Narrower?
- How Do I Make the Blanket Longer?
- How Do I Make the Blanket Shorter?
- Blanket Resizing for Yarn Weight & Hook Size
- What Is the Best Way to Resize a Blanket?
- What Should I Check Before Starting a Resized Blanket?
- Stitch Sampler Resizing Tip
- How Do I Start My Blanket?
- What Do I Need to Know Before Making My Starting Chain?
- How Do I Calculate My Starting Chain?
- Starting Chain and Starting Row Tips
- How Do I Work the Foundation Row?
- Which Loop of the Starting Chain Should I Work Into?
- How Do I Keep My Foundation Chain From Twisting?
- Foundation Row Tips
- How Do I Know Where the First Stitch Goes?
- Does the Turning Chain Count as a Stitch?
- How Do I Keep My Stitch Count Correct?
- What If My Foundation Row Has Too Many Stitches?
- What If My Foundation Row Has Too Few Stitches?
- What If My Starting Chain Is Too Tight?
- What If My Foundation Row Is Wider Than My Starting Chain?
- Should I Measure My Blanket After the Foundation Row?
- Should I Mark the First and Last Stitches?
- What Is the Best Way to Start a Large Blanket?
- Can I Start With a Foundation Single Crochet Instead?
- What Should I Do Before Starting Row 2?
- Quick Starting Blanket Checklist
- Beginner Tip: Take Your Time With Row 1
- How Do I Work the Stitch Sampler Rows?
- How Do I Read a Crochet Stitch Diagram?
- Which Crochet Stitches Are Used?
- How Do I Keep Track of Stitch Counts?
- How Do I Read the Beginning and End of Each Row?
- What If My Stitch Count Is Wrong?
- Adding or Removing Stitches
- How Do I Handle Colour Changes Between Rows?
- How Do I Keep Track of Row Colours?
- How Do I Keep My Row Direction Correct?
- How Do I Finish Each Row?
- What Should I Do If a Row Looks Different?
- What If My Edges Are Uneven?
- Should I Block the Blanket While I Work?
- How Do I Keep My Stitch Tension Consistent?
- What Should I Do If I Am Learning a New Stitch?
- Key Notes for Beginners
- Should I Read the Next Row Before Finishing the Current Row?
- How Do I Keep My Blanket Organized While Working?
- What Should I Do If I Need to Stop Mid-Row?
- What Should I Check at the End of Every Row?
- When Should I Fasten Off?
- How Do I Weave in My Ends?
- How Do I Know When a Stitch Sampler Row Is Correct?
- Quick Stitch Sampler Row Checklist
- Key Tip: Work One Row at a Time

What Is a Crochet Stitch Sampler Blanket?
A crochet stitch sampler blanket is a project that combines many different crochet stitches within one blanket design. Each section of the blanket features a different stitch pattern, creating texture and visual interest across the project.
Stitch sampler blankets are popular learning projects because they allow crocheters to practice multiple crochet stitches while completing one finished item.
Thank you to everyone who has supported our crochet patterns. If you have already purchased one of our stitch sampler blanket patterns, we hope you are enjoying the process of learning new stitches and creating something beautiful. If you are still deciding on your next crochet project, we’re excited to help inspire your next handmade creation.
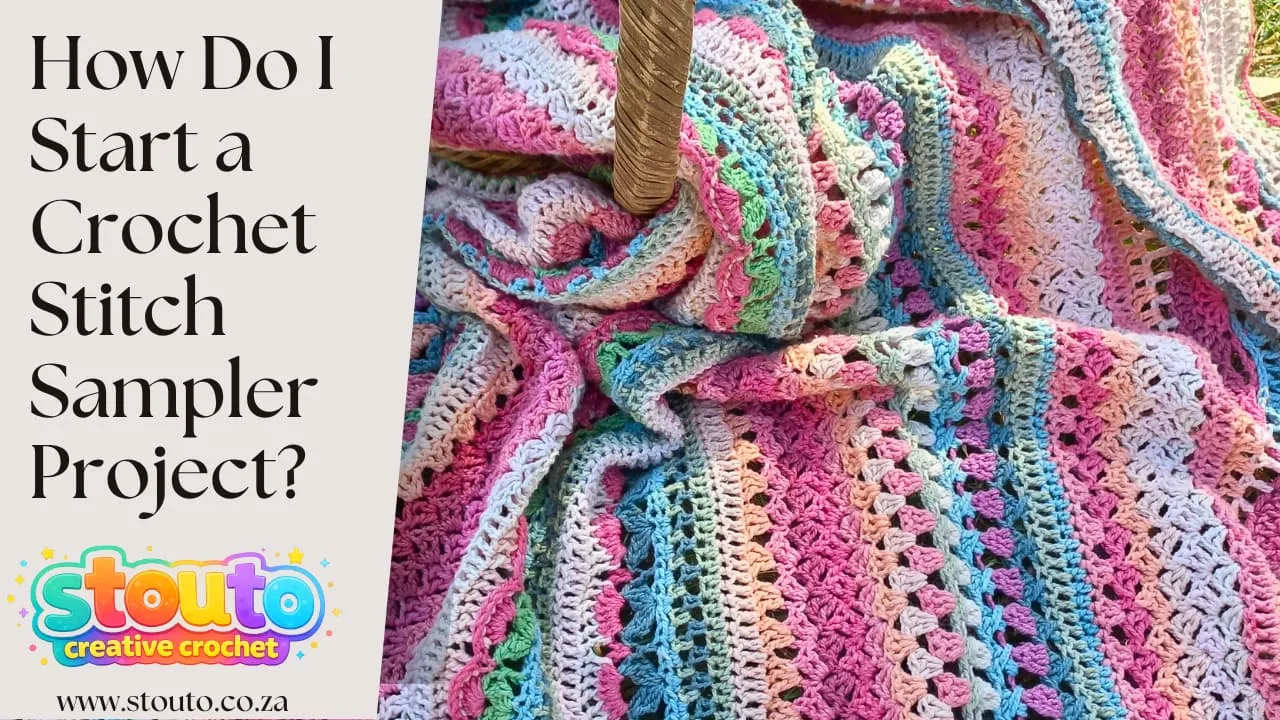
How Do I Start a Crochet Stitch Sampler Project?
Starting a crochet stitch sampler project can feel a little more complicated than starting a simple blanket because you will be working with different stitches, stitch repeats, textures and often several colours. The good news is that once you understand the basic structure of a stitch sampler, you can approach the project one step at a time.
Before you make your first chain, take a few minutes to prepare your pattern, yarn, hook and project size. This will help prevent problems with stitch counts, tension and sizing later.
1. Read the Pattern Before You Start
Before picking up your crochet hook, read through the pattern notes from beginning to end.
Look for information about:
- The recommended yarn weight and type
- Crochet hook size
- Gauge, if provided
- Starting chain or foundation stitch requirements
- Stitch multiples and repeats
- Special stitches
- Stitch counts
- Colour changes
- Number of rows
- Sizing and resizing instructions
- Border and finishing instructions
This is particularly important with stitch sampler blankets because different rows may use different stitch combinations. Understanding the stitch repeat before you begin makes the pattern much easier to follow.
2. Gather Your Crochet Materials
Have everything you need beside you before starting.
For most stitch sampler projects you will need:
- Yarn
- The recommended crochet hook
- Scissors
- Yarn needle
- Stitch markers, if required
- Your crochet pattern
- A tape measure for checking size
Having your materials ready means you can concentrate on learning the stitch patterns instead of stopping halfway through a row to find something you need.
3. Choose Yarn That Shows Off the Stitches
A stitch sampler blanket is all about texture, so choose yarn with good stitch definition.
A good yarn for a sampler project should ideally be:
- Easy to work with
- Soft and comfortable
- Durable enough for a blanket
- Available in colours you enjoy
- Machine washable if the finished blanket will need regular washing
Avoid choosing yarn only because you like the colour. A yarn that clearly shows the individual stitches will make textured patterns, shells, waves, clusters and other stitch combinations much easier to see.
If you are using several colours, arrange your yarn before starting so you have an idea of how the colours will flow through the blanket.
4. Choose the Correct Crochet Hook
Start with the crochet hook recommended for your chosen yarn.
The yarn label will normally provide a suggested hook size, but always follow the specific recommendations in your pattern when they differ.
Your hook size affects the finished blanket:
- A larger hook generally creates larger, looser stitches.
- A smaller hook creates smaller, tighter stitches.
- A lighter yarn combined with a smaller hook will generally produce a smaller project.
- A heavier yarn combined with a larger hook will generally produce a larger project.
For a stitch sampler blanket, try to keep the same yarn weight and hook size throughout the project unless the pattern specifically tells you otherwise. Changing yarn or hook size partway through can change your gauge and cause the blanket to become uneven.
Keep your tension relaxed. A sampler blanket generally looks and feels better when the fabric is soft and flexible rather than stiff.
5. Decide How Large You Want Your Blanket to Be
Before making your starting chain, decide what finished size you want.
Check the pattern to see whether it provides:
- One standard blanket size
- Several blanket sizes
- A stitch-count resizing formula
- A pattern repeat that can be repeated to increase the width
- Instructions for adding or removing rows
Some stitch sampler patterns are designed around specific stitch multiples. This means you cannot simply add any number of stitches to make the blanket wider.
The additional stitches must fit the stitch-repeat structure of the pattern.
6. Check Your Gauge if the Pattern Provides Gauge Information
If your pattern provides gauge information, make a small swatch before starting the blanket.
Gauge tells you how many stitches and rows you make within a specific measurement, such as 10 cm / 4 inches.
Your tension affects the final blanket size, so two crocheters using the same yarn and hook can produce different-sized blankets.
For a stitch sampler, it is particularly useful to check gauge using the actual stitch patterns rather than only making a swatch of simple double crochet or single crochet.
This gives you a more realistic idea of how your chosen stitches behave.
7. Check the Stitch Repeat Before Making Your Chain
This is one of the most important steps when starting a stitch sampler.
Look at the pattern and identify the required stitch repeat.
Your starting chain must produce the correct number of stitches for the pattern.
If the stitch repeat is wrong, later rows may not line up correctly.
Before starting, identify:
- The total starting stitch count
- The stitch multiple
- Any additional edge stitches
- The first stitch
- The final stitch
- Any turning chain that counts as a stitch
8. Make Your Starting Chain
Once you know your required stitch count, make your foundation chain according to the pattern.
Try not to crochet the chain too tightly.
A tight foundation chain can cause the bottom edge of your blanket to pull inward and make the finished project difficult to lay flat.
If you naturally crochet tightly, you can try:
- Loosening your tension
- Using a larger hook for the foundation chain
- Using a foundation stitch such as foundation single crochet (FSC) or foundation half double crochet (FHDC), if appropriate for the pattern
Always follow the pattern instructions when deciding whether a foundation-stitch technique can be substituted.
9. Consider Using a Foundation Row
Some stitch sampler projects can be started using a foundation row rather than a traditional chain followed by the first row.
A foundation row creates the chain and first row of stitches together. This can give the beginning of a blanket a more flexible edge.
If you use the foundation-row technique where the pattern allows it, you can generally skip the first row of the written pattern and the corresponding first row of the stitch diagram because the foundation row has already created those stitches.
10. Work the Foundation Row
For the Stouto stitch sampler foundation-row example, the blanket begins with the required foundation chain followed by a row of half double crochet stitches.
- Make the required foundation chain for your chosen blanket size.
- Chain 2 additional stitches.
- Work 1 half double crochet into the 3rd chain from the hook.
- Continue working 1 half double crochet into each chain across.
- Work into the final chain.
- Check your stitch count when the row is complete.
The foundation row creates the stable base for the stitch sampler sections that follow.
11. Check Your Stitch Count Before Continuing
Do not skip this step.
Before beginning the first sampler stitch pattern, count your stitches.
Your completed foundation row should contain exactly the number of stitches required by the pattern.
This check is much easier to do now than after you have worked several complicated stitch-pattern rows.
If your stitch count is incorrect, stop and find the problem before continuing.
A wrong stitch count at the beginning can cause:
- Stitch repeats to stop lining up
- Edges to become uneven
- The blanket to become wider or narrower
- Later rows to have too many or too few stitches
12. Understand Your Base Stitch Count
One of the most useful habits when working a stitch sampler is to keep track of your base stitch count.
Even though each row may use completely different stitches, the overall row should normally maintain the required stitch count unless the pattern specifically tells you to increase or decrease.
Different stitch combinations can still produce the same total number of stitches.
Always check the written instructions and stitch diagram to see how the pattern achieves that count.
13. Learn How to Read the Stitch Diagram
If your stitch sampler pattern includes diagrams, look at the diagram before beginning each new stitch section.
A crochet diagram can help you see:
- Where stitches are placed
- Which stitches are skipped
- Where clusters are formed
- How stitches repeat
- Where the row begins and ends
- How the pattern changes from one row to the next
You do not need to rely on the diagram alone. The diagram is intended to work together with the written instructions.
14. Pay Attention to the Beginning and End of Every Row
Stitch sampler rows do not always start and finish in exactly the same way.
A row may have:
- A turning chain
- One or more starting stitches
- A repeated centre section
- Skipped stitches
- A different final stitch
Always read the beginning and ending instructions carefully.
Do not assume that the final repeat automatically takes you all the way to the edge. Check what the pattern tells you to do with the final stitches.
15. Keep Your Stitch Count Consistent
Count your stitches at the end of each row, especially when you move from one stitch pattern to another.
This is one of the best ways to prevent your blanket from gradually becoming wider or narrower.
Pay particular attention to:
- Skipped stitches
- Shells
- Clusters
- V-stitches
- Post stitches
- Multiple stitches worked into one stitch
- Stitches worked into spaces
- The first and last stitch of each row
A single missed or added stitch can affect every row that follows.
16. Use Stitch Markers When You Need Them
Stitch markers are useful when a pattern contains complicated repeats.
You can use them to mark:
- The beginning of a repeat
- The end of a repeat
- The first stitch
- The last stitch
- Important pattern sections
They are especially useful when you are learning unfamiliar stitches.
17. Keep Your Row Direction Consistent
When working a sampler blanket with a new colour for each row, pay attention to which side you are working from.
A useful Stouto tip is to use the yarn tail from the previous row as a visual reference.
When the work is turned, the previous row's tail should sit on your right as you work toward the left. This helps you keep your row direction consistent.
18. Start Your First Stitch Pattern Row
Once your foundation row is complete and your stitch count is correct, you are ready to begin the first stitch pattern.
Follow the pattern exactly for:
- The turning chain
- The first stitch
- Skipped stitches
- Stitch repeats
- Special stitches
- The final stitches of the row
Work slowly while you are learning a new stitch. There is no need to rush a stitch sampler project. The purpose is to enjoy experimenting with different textures while creating a finished blanket.
19. Take Your Time With Each New Stitch
One of the best things about a stitch sampler blanket is that you do not need to know every stitch before you begin.
Treat each new stitch section as a small learning exercise.
If you encounter a stitch you have never made before:
- Read the written instructions.
- Look at the stitch diagram.
- Check the stitch abbreviation.
- Practice the stitch separately if necessary.
- Return to the pattern and work the row slowly.
- Check your stitch count when finished.
The more stitch patterns you work, the easier it becomes to recognise how crochet stitches fit together.
20. Enjoy the Process
A stitch sampler blanket is both a finished project and a way to practise crochet.
You may encounter unfamiliar stitches, unusual repeats or rows that take longer than expected. That is part of the learning process.
Work one section at a time, check your stitches regularly and allow yourself to undo and redo a row when necessary.
By the time you reach the end, you will have created more than a blanket — you will also have practised a collection of crochet techniques that you can use in future projects.
Quick Start Checklist
Before you begin your first row, make sure you can answer yes to these questions:
- ☐ Have I read the pattern notes?
- ☐ Do I have the correct yarn?
- ☐ Do I have the recommended crochet hook?
- ☐ Do I know my desired blanket size?
- ☐ Do I know the required starting stitch count?
- ☐ Do I understand the stitch repeat?
- ☐ Have I checked the gauge, if provided?
- ☐ Is my starting chain loose enough?
- ☐ Have I completed the foundation row correctly?
- ☐ Does my foundation row have the correct stitch count?
- ☐ Do I understand the first stitch pattern?
- ☐ Do I know how to read the stitch diagram?
If all of these are checked, you're ready to begin your stitch sampler!
What If Something Goes Wrong?
Don't panic if your blanket doesn't look right after the first few rows.
First check:
Is my stitch count correct?
Then check:
Did I follow the stitch repeat correctly?
Then check:
Did I work the first and last stitches correctly?
Finally, check:
Am I maintaining the same yarn, hook size and tension?
Most problems with stitch sampler blankets can be traced back to one of these areas. Once you identify the problem, it is usually much easier to correct it before continuing.
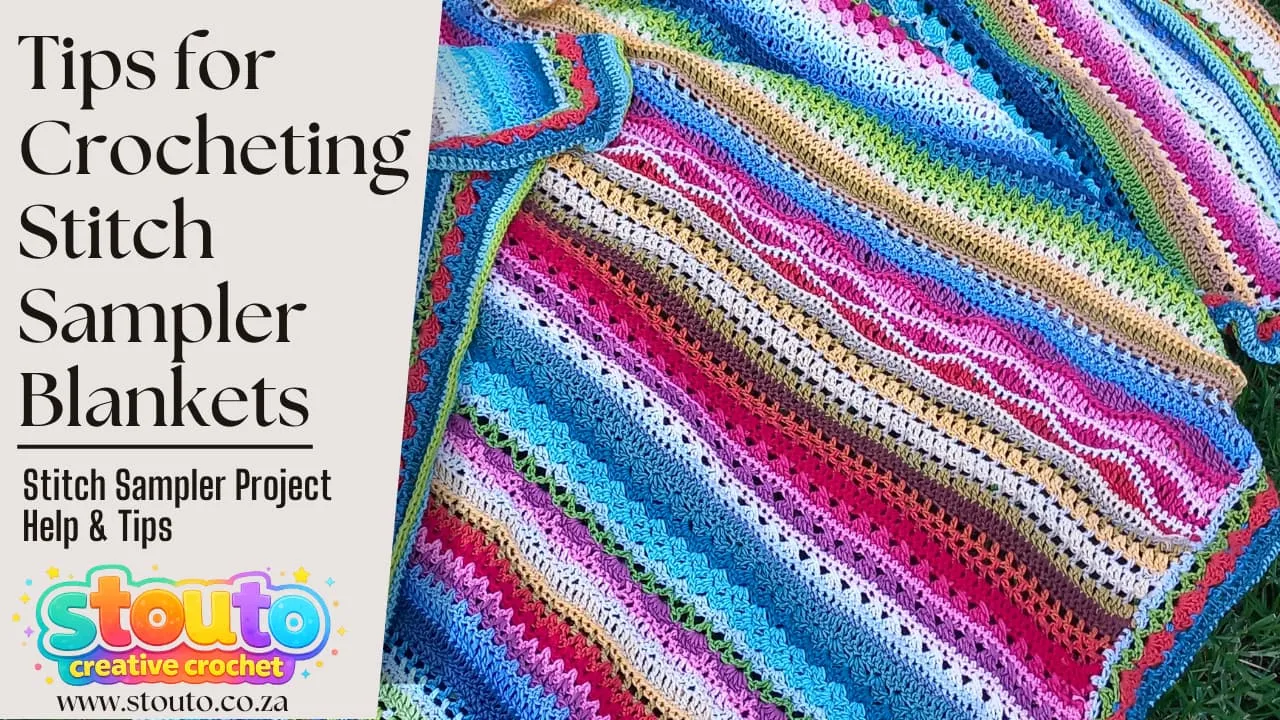
Tips for Creating a Stitch Sampler Blanket
Crochet stitch sampler blankets and projects are wonderful for learning new crochet stitches while creating a beautiful finished item. Before starting your project, taking a few preparation steps will help ensure your stitch sampler turns out the way you expect.
Follow these tips and steps to prepare for a successful stitch sampler crochet project.
- Read the Pattern Notes
Begin by reading through the pattern notes carefully. These notes often contain important information about stitch repeats, special stitches, color changes, and sizing instructions. - Gather Your Materials
Make sure you have all the required materials ready before starting your project. This usually includes yarn, a crochet hook, scissors, a yarn needle, and stitch markers if needed. - Choose and Prepare Your Yarn
Select yarn that highlights stitch definition so the different stitch patterns are easy to see. If you are using multiple colors or scrap yarn, arrange the yarn colors in the order you would like to use them. - Determine Your Project Size
Decide on the finished size of your blanket or project before starting. If the pattern includes resizing instructions, take note of the stitch multiples needed to adjust the width. - Check Gauge (If Provided)
Some stitch sampler projects include gauge information. Making a small swatch can help ensure your blanket will reach the intended size. - Learn How to Read Stitch Diagrams
Many stitch sampler patterns include stitch diagrams to visually represent the rows. These diagrams make it easier to understand complex stitch patterns and follow the structure of each section. - Create the Starting Chain
Make the starting chain according to the pattern instructions. Be sure the chain count matches the stitch repeat requirements. - Work the Foundation Row
After creating the chain, crochet the foundation row as instructed in the pattern. This row prepares the stitches for the first stitch pattern section. - Check the Stitch Count
Before continuing, count your stitches carefully to make sure the row matches the pattern stitch count. - Begin the First Stitch Pattern Row
Once your foundation row is complete and the stitch count is correct, begin working the first stitch pattern in the sampler sequence. - Use Stitch Markers if Needed
Stitch markers can help identify pattern repeats or keep track of important stitches in more complex sections. - Enjoy the Process
Stitch sampler projects are designed to help you learn and explore different crochet stitches. Take your time and enjoy watching the textures build row by row. - Follow the Finishing Instructions
When you reach the end of the pattern, complete the finishing instructions such as adding borders, weaving in ends, or blocking your project. - Enjoy Your Finished Stitch Sampler Blanket
Take a moment to appreciate the textures, colors, and stitches you have created throughout the project. - Share Your Finished Project
Sharing your finished crochet project with the crochet community can inspire others. Consider sharing photos of your stitch sampler blanket on social media or with other crocheters. - ↑ Back to top
Tips for Crocheting Stitch Sampler Blankets
- Keep consistent tension throughout the project.
- Use the same crochet hook size across the blanket.
- Count stitches at the end of every row.
- Use stitch markers to track pattern repeats.
- Check stitch diagrams alongside written instructions
Explore More Crochet Stitch Sampler Patterns
Ready to try another stitch sampler project? Explore the complete Stouto Creative Crochet Stitch Sampler Pattern Collection .
The collection brings together different types of sampler projects, including stitch sampler blankets, temperature blankets, scrap-yarn projects and wearable sampler designs. It is a great place to find your next project when you want to learn new stitches while creating something useful and beautiful.
Popular Stitch Sampler Patterns
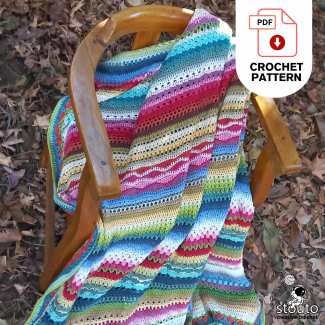
Crochet Stitch Sampler for Beginners
A beginner-friendly sampler blanket that introduces different crochet stitches and textures row by row. A great choice if you want to learn while making a full-size project.
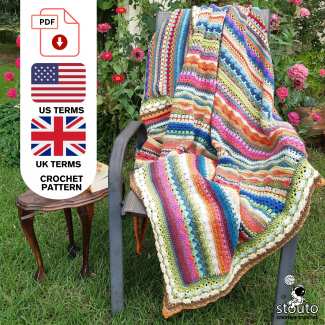
Striped Stitch Sampler Afghan
A colourful striped sampler combining different stitch patterns to create texture and visual interest throughout the blanket.
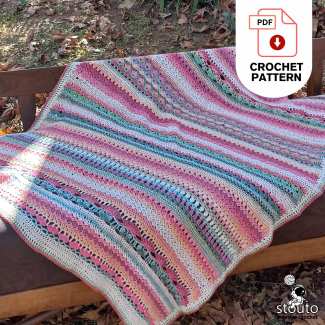
Rose Garden Flower Stitch Sampler
A floral-inspired stitch sampler that combines decorative stitches and colour to create a garden-inspired crochet project.
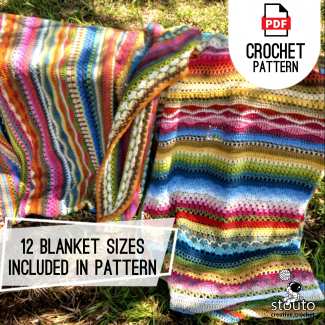
Ultimate Stitch Sampler Blanket
A larger stitch sampler project for crocheters who want to explore a wide variety of crochet stitches and textures in one 210 row crochet blanket.
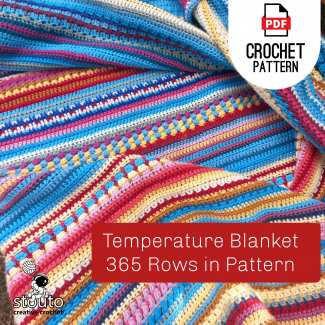
Crochet Temperature Blanket
Combine the idea of a stitch sampler with a temperature blanket by working different colours and stitch patterns throughout the project.
Rainbow Striped Crochet Baby Blanket
A colourful striped blanket project that is ideal for crocheters who enjoy combining simple stitch patterns with bold colour changes.
See the Full Stitch Sampler Collection
These are just some of the projects available. Browse the complete collection to compare different stitch sampler styles and find a pattern that suits your skill level, preferred yarn and project size.
Explore More Crochet Patterns & Tutorials
Enjoying your stitch sampler project? Explore more crochet patterns and tutorials from Stouto Creative Crochet. Whether you want to start another blanket, experiment with large granny squares, use up your yarn stash, or learn a new crochet technique, you'll find plenty of ideas to inspire your next project.
Crochet Blanket Patterns
Discover more crochet blanket patterns, including colourful, textured and creative designs for beginners and experienced crocheters.
Granny Squares
Try a different approach to blanket making with large crochet square patterns. These larger squares can create beautiful blankets with fewer individual pieces to join.
Scrap Yarn Projects
Turn leftover yarn into something beautiful with scrap yarn crochet projects. Stitch samplers and stash-friendly projects are a great way to use small amounts of yarn.
Crochet Tutorials
Need help with a stitch or technique? Browse the crochet tutorials for step-by-step guides, stitch instructions and helpful crochet tips.
Keep exploring: Your next crochet project could be just one stitch away. Browse the patterns and tutorials above to find your next project.
.
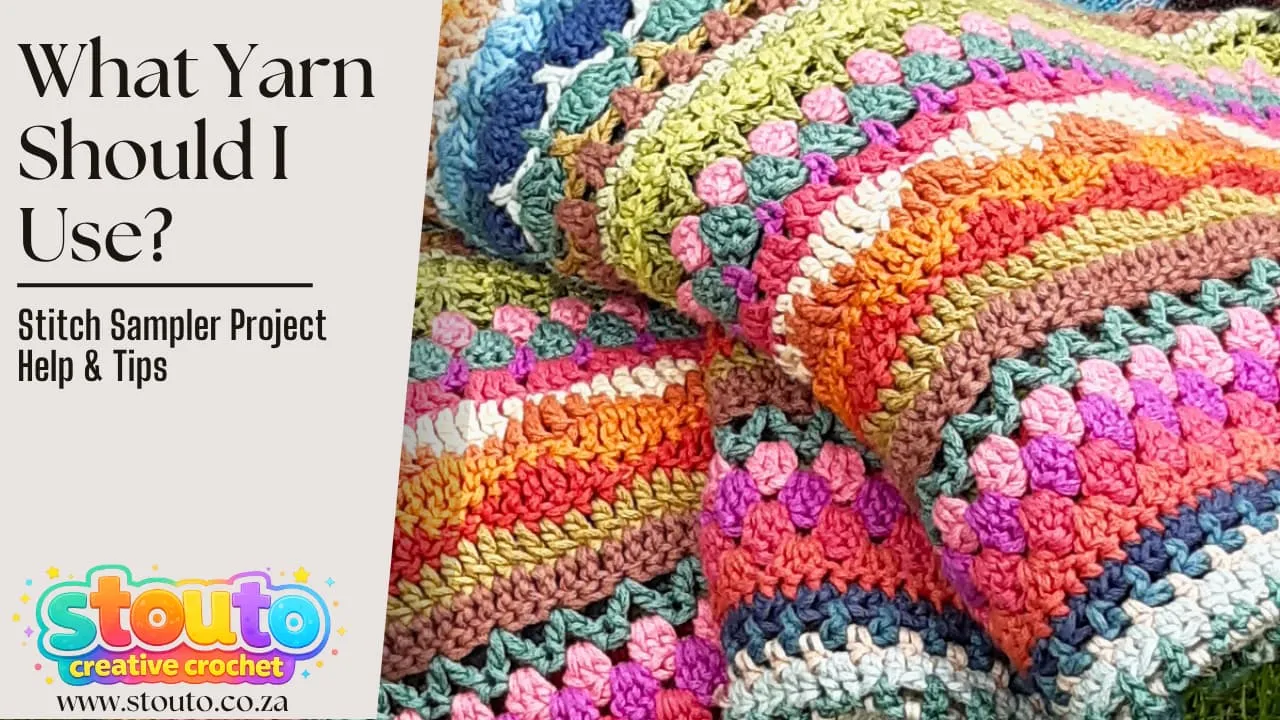
What Yarn Should I Use?
Choosing the right yarn is one of the most important decisions when starting a crochet stitch sampler blanket. Because a stitch sampler combines different stitches, textures and patterns, your yarn can make a big difference to how clearly the stitches show, how soft the finished blanket feels, and how the blanket drapes.
The good news is that you don't have to use the exact yarn shown in a pattern. Stitch sampler blankets are particularly flexible projects, and you can choose yarn based on your preferred texture, colours, climate, budget and the type of blanket you want to make.
For the best results, look for yarn with good stitch definition, a comfortable texture, suitable durability and colours that you enjoy working with.
What Type of Yarn Is Best?
The best yarn for a crochet stitch sampler blanket is one that allows you to clearly see and feel the different stitches while producing a comfortable, durable fabric.
Because stitch sampler blankets contain many different stitch patterns, smooth yarns with good stitch definition are generally a good choice. They allow details such as shells, clusters, V-stitches, textured stitches and openwork to remain visible instead of being hidden by a heavily textured yarn.
When choosing your yarn, consider the following:
- Choose yarn with good stitch definition. Smooth yarn makes it easier to see the individual stitches and appreciate the different textures in a sampler blanket.
- Choose yarn that feels good to you. A blanket is a project you will spend many hours making, so choose a yarn you enjoy handling.
- Consider softness and durability. A blanket needs to withstand regular use, so choose yarn that is both comfortable and hard-wearing.
- Consider machine-washable yarn. If the finished blanket will be used regularly, easy-care yarn can make washing and maintaining the blanket much easier.
- Choose a yarn that is easy to find. Stitch sampler blankets often use several colours, so it helps to choose a yarn brand with a wide colour range and good availability.
- Consider your climate. A lightweight cotton or DK yarn can create a cooler, breathable blanket, while wool, acrylic and heavier yarns can create a warmer, cosier blanket.
- Think about your budget. You don't need an expensive yarn to create a beautiful stitch sampler. There are many affordable yarns that offer good colour selection, softness and durability.
Which Yarn Fibre Should I Choose?
Different fibres give your finished blanket different characteristics.
- Cotton: Provides crisp stitch definition, is breathable and works particularly well when you want the stitch details to stand out.
- Acrylic: Is lightweight, durable, generally affordable and easy to care for, making it a practical choice for everyday blankets.
- Wool: Provides warmth, elasticity and a cosy feel, making it well suited to cold-weather blankets.
- Blends: Can combine the advantages of different fibres, such as softness, strength, warmth and easy care.
There is no single “correct” fibre for a stitch sampler blanket. Choose the fibre that suits the finished blanket you have in mind, as well as your climate and how you want to care for the finished project.
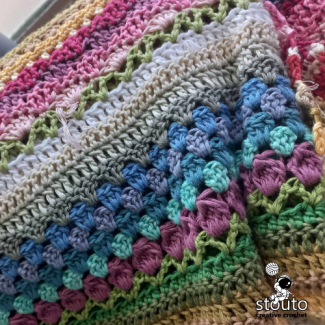
Can I Use a Different Yarn From the Pattern?
Yes. You can substitute yarn, but changing the yarn weight or hook size can change the finished dimensions, texture and drape of your blanket.
If you are using a different yarn from the original pattern, make a small swatch first. This lets you check your tension and estimate how the new yarn will behave before committing to the entire blanket.
If the substitute yarn is a different weight, check the pattern's resizing instructions as you may need to adjust your starting chain or the number of stitch repeats to achieve your desired blanket size.
Which Yarn Weight Is Best?
There isn't one yarn weight that is best for every stitch sampler blanket. The right weight depends on the finished blanket you want to create.
For most crochet blankets, Worsted Weight (Medium 4) is a popular choice because it provides a good balance between warmth, weight, stitch definition and ease of use. However, lighter and heavier yarns can work beautifully too.
- DK / Double Knit (Weight 3): A good choice for a lighter, softer and more drapey blanket. DK yarn works particularly well when you want a blanket that isn't too heavy and can be used throughout much of the year.
- Worsted Weight (Medium 4): A versatile choice for blankets. It works up relatively quickly and creates a blanket that is warm without being excessively heavy.
- Aran / Light Worsted: Similar to worsted weight but generally a little thicker, creating a denser and warmer fabric.
- Bulky (Weight 5): A good option when you want a thick, warm and cosy blanket that works up more quickly. Keep in mind that the finished blanket will be heavier and thicker.
- Super Bulky (Weight 6): Creates a very thick and plush blanket and works up quickly. However, the fabric can become quite heavy or stiff depending on the stitch pattern, so a swatch is especially important.
As a general guide, lighter yarn produces a lighter and finer blanket, while heavier yarn produces a larger, thicker and warmer blanket.
How Does Yarn Weight Affect My Blanket?
Changing yarn weight changes more than just the appearance of your blanket. It can affect:
- The finished width and length
- The thickness of the fabric
- The weight of the finished blanket
- The amount of yarn required
- The drape of the fabric
- The size of the individual stitches
- How quickly the blanket works up
For example, a DK blanket will generally be lighter and more delicate than the same stitch sampler worked in bulky yarn.
Do I Need to Make a Gauge Swatch?
If you are changing the yarn weight from the original pattern, yes, making a swatch is strongly recommended.
A gauge swatch allows you to check how many stitches and rows you are getting with your chosen yarn and hook before you start the entire blanket.
This is particularly important when using bulky or super bulky yarn because a small difference in gauge can make a significant difference to the final blanket size.
If your gauge differs from the pattern, you may need to change your hook size or use the pattern's resizing instructions.
What Yarn Weight Should I Use for a Warmer Blanket?
If your priority is warmth, a heavier yarn such as Aran, Bulky or Super Bulky can create a thicker, warmer blanket.
However, remember that heavier yarn also produces a heavier finished blanket. Some stitch patterns can also become stiff when worked in very thick yarn.
For a warm but versatile everyday blanket, Worsted or Aran can be a good middle ground.
What Yarn Weight Should I Use for a Lightweight Blanket?
For a lighter blanket with more drape, consider DK or another lighter yarn weight.
DK yarn is particularly useful when you want a blanket that feels soft and comfortable without becoming too heavy. It can also be a good choice for warmer climates or blankets that will be used throughout the year.
Can I Use Scrap Yarn?
Absolutely! Stitch sampler blankets are one of the best crochet projects for using leftover yarn.
Because each section of a sampler can introduce a different stitch, changing colours between rows gives you plenty of opportunities to use small amounts of yarn from previous projects.
You don't need to have enough of one colour to make an entire blanket. Small quantities can become part of individual rows, colour sections or stitch patterns.
Using scrap yarn also means that your finished blanket can become a collection of memories from previous crochet projects.
How Do I Use Different Leftover Yarns in One Blanket?
The easiest approach is to group your leftover yarns by weight and fibre before starting.
Try to keep yarns within a similar weight range if you want the blanket to maintain a consistent gauge and fabric.
For example, combining several DK yarns in different colours is generally easier than randomly combining DK, worsted and super bulky yarns throughout the same blanket.
If you do want to mix yarn weights, plan your project carefully and understand that the changes can affect stitch size, tension, texture and finished dimensions.
How Can I Make Scrap Yarn Colours Work Together?
You don't need to follow the exact colour sequence shown in a pattern. One of the advantages of a stitch sampler blanket is the freedom to create your own colour combination.
You can use:
- Rainbow colours
- Three to five coordinated colours
- Pastel shades
- Bright colours
- Neutral colours
- A combination of neutrals and accent colours
- Leftover yarn from your existing stash
- Self-striping yarn for additional colour variation
A neutral colour can help balance a collection of bright colours, while a gradient or rainbow palette can create a strong visual flow through the blanket.
Explore more ideas on the Scrap Yarn Crochet Project Hub.
What If I Run Out of a Scrap Yarn Colour?
Don't worry. Running out of a colour doesn't have to ruin a stitch sampler blanket.
You can simply replace it with another colour that works with the rest of your palette. The freedom to change colours is one of the things that makes stitch sampler blankets so useful for stash-busting.
If you are following a specific colour sequence, make a note of your changes so you can repeat the colour plan consistently.
Can I Mix Different Yarn Brands?
You can mix yarn brands, but pay attention to the yarn weight, fibre, thickness and texture rather than relying only on the label.
Two yarns both labelled “DK” can behave slightly differently. If one is noticeably thicker, thinner, stretchier or more textured than the other, it may change the appearance of your stitches.
When combining yarns from different brands, making a small test swatch is the safest way to see how they work together.
Quick Yarn Checklist
Before starting your stitch sampler blanket, ask yourself:
- ☐ Does the yarn have good stitch definition?
- ☐ Do I like the way the yarn feels?
- ☐ Is the yarn suitable for the climate and purpose of my blanket?
- ☐ Is the yarn durable enough for the finished project?
- ☐ Do I have enough yarn, or can I easily buy more?
- ☐ Does the yarn weight suit the size and drape I want?
- ☐ Have I checked the recommended hook size?
- ☐ Have I made a gauge swatch if I am changing yarn?
- ☐ If I'm using scrap yarn, are the yarn weights reasonably compatible?
The most important rule? Choose yarn that you enjoy working with. A stitch sampler blanket is an opportunity to experiment with colour, texture and stitches, so your yarn choice doesn't have to match someone else's project exactly.
```
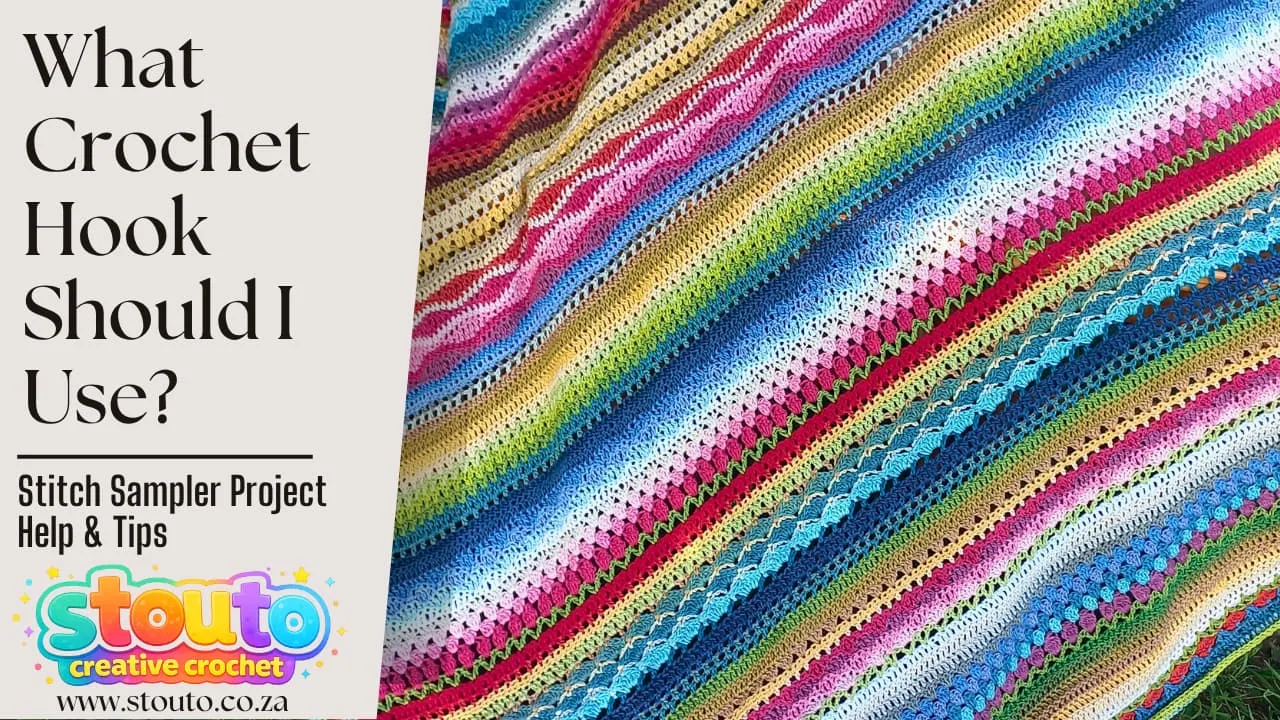
What Crochet Hook Should I Use?
Choosing the right crochet hook is important when making a stitch sampler blanket because your hook size affects the size, tension, texture, drape and overall feel of the finished blanket.
The best crochet hook for your stitch sampler project usually depends on the yarn weight you are using. As a starting point, use the crochet hook size recommended on your yarn label and then check the requirements of your specific pattern.
For the Stouto stitch sampler blanket example, a 4 mm crochet hook is used with the recommended yarn. However, your ideal hook size may be different if you choose a different yarn weight or if your crochet tension differs from the pattern gauge.
The most important thing is to create a fabric that is comfortable, flexible and consistent throughout the project.
How Do I Choose the Right Crochet Hook Size?
Start by checking the yarn label. Yarn manufacturers usually provide a recommended crochet hook size for the particular yarn weight.
Then check your crochet pattern for its recommended hook size and gauge.
As a general guide:
- Lighter yarn → smaller crochet hook
- Heavier yarn → larger crochet hook
The yarn label is a useful starting point, but it is not an absolute rule. Your personal crochet tension can affect which hook size gives you the correct gauge.
What Crochet Hook Size Is Used for the Stouto Stitch Sampler Blanket?
The Stouto stitch sampler blanket example is worked using a 4 mm crochet hook.
The original pattern information uses a 4 mm hook with its recommended yarn, but you can adjust your hook size if you are substituting yarn or need to change your tension to achieve the desired gauge.
What Happens If I Use a Smaller Crochet Hook?
A smaller crochet hook generally creates smaller, tighter stitches.
This produces a denser fabric and can make the finished blanket smaller than the pattern dimensions if the yarn and stitch count remain the same.
A smaller hook may be useful when:
- Your crochet tension is very loose.
- Your gauge is larger than the pattern gauge.
- You want a denser fabric.
- You are working with a lighter yarn.
However, using a hook that is too small for your yarn can make the fabric stiff and uncomfortable to work with. Your stitches should still be able to move freely on the hook.
What Happens If I Use a Larger Crochet Hook?
A larger crochet hook generally creates larger, looser stitches.
This can produce a softer, more open fabric with greater drape. It can also make the finished blanket larger if you use the same yarn and stitch count.
A larger hook may be useful when:
- Your crochet tension is very tight.
- Your gauge is smaller than the pattern gauge.
- You want a softer, more open fabric.
- You are working with a heavier yarn.
Be careful not to go too large, particularly with open or lacy stitch patterns, as the fabric can become too loose and lose its structure.
How Does Crochet Hook Size Affect My Blanket?
Your crochet hook size affects much more than the individual stitches.
Changing hook size can affect:
- The finished width of the blanket
- The finished length of the blanket
- The number of stitches per measurement
- The number of rows per measurement
- The thickness of the fabric
- The drape of the blanket
- The overall weight of the blanket
- The amount of yarn required
- The appearance of textured stitches
This is why hook size and yarn weight should be considered together rather than separately.
Should I Use the Same Crochet Hook for the Whole Blanket?
Yes, whenever possible.
For a stitch sampler blanket, it is strongly recommended that you use the same hook size throughout the project unless the pattern specifically instructs you to change hooks.
Changing hook size between rows can change your gauge and tension. This can cause some sections of the blanket to become wider, narrower, tighter or looser than others.
Using the same hook throughout helps maintain a consistent fabric and keeps the different stitch sections working together correctly.
Can I Change My Hook Size When I Change Yarn?
Yes, but be careful when changing yarn.
If you change to a different yarn weight, you may need to change your crochet hook size to match the new yarn.
For example:
- Lighter yarn: generally requires a smaller hook.
- Heavier yarn: generally requires a larger hook.
However, if you are changing yarn within the same project, changing hook size can affect the gauge and appearance of the blanket. If possible, choose a yarn that works with the same hook size used for the rest of your project.
What If I Am Using a Different Yarn From the Pattern?
If you are substituting yarn, don't automatically assume that you must use the exact hook size from the original pattern.
Start with the hook size recommended for your new yarn and make a gauge swatch.
Compare your swatch with the pattern gauge and adjust your hook size if necessary.
This is particularly important if your substitute yarn is a different weight from the original yarn.
Do I Need to Make a Gauge Swatch?
A gauge swatch is highly recommended, especially if you are using a different yarn, changing hook size or need your finished blanket to match a particular size.
A gauge swatch allows you to check how your yarn, hook and personal tension work together before you commit to the entire blanket.
Check:
- How many stitches you make within the specified measurement
- How many rows you make within the specified measurement
- How loose or dense the fabric feels
- How the stitch pattern looks
- Whether the fabric has the amount of drape you want
For a stitch sampler, it is particularly useful to test some of the actual stitch patterns you will be using because different stitches can behave differently.
How Does My Crochet Tension Affect Hook Choice?
Your crochet tension is just as important as your hook size.
Two people can use exactly the same yarn and hook and still produce different-sized blankets because they crochet with different levels of tension.
If you crochet tightly, your fabric may be smaller and denser than the pattern.
If you crochet loosely, your fabric may be larger and more open.
Rather than trying to force your hands to crochet exactly like someone else, use your gauge swatch to determine whether you need to adjust your hook size.
Should My Stitch Sampler Blanket Have a Tight or Loose Tension?
A stitch sampler blanket generally benefits from a relaxed and consistent tension.
The finished fabric should be soft and flow naturally rather than feeling stiff or overly tight.
A relaxed tension is particularly useful when working a blanket containing many different stitch patterns because some stitches naturally use more yarn or create more texture than others.
Try to maintain a similar tension from row to row even when you are learning a new stitch.
What Hook Should I Use for Different Yarn Weights?
There is no single hook size that works for every yarn weight, so always check the yarn label and pattern first.
As a general starting point:
- Lightweight yarn: generally uses a smaller crochet hook.
- DK or light-medium yarn: generally uses a small-to-medium hook.
- Worsted or medium-weight yarn: generally uses a medium-sized hook.
- Aran or heavier yarn: generally uses a larger hook.
- Bulky yarn: generally requires a larger hook.
- Super bulky yarn: generally requires a very large hook.
These are only starting points. Always use the recommended hook range on the yarn label and adjust according to your gauge and the requirements of your pattern.
Can I Use a Different Hook Size to Change the Blanket Size?
Yes, but changing hook size is not the only way to resize a stitch sampler blanket.
A larger hook can increase the size of your stitches, while a smaller hook can reduce the size. However, changing the hook also changes the fabric, tension and drape.
If you want to deliberately change the blanket size, it is usually better to follow the pattern's resizing instructions and maintain the required stitch multiples rather than relying entirely on a different hook size.
What If My Blanket Is Too Small?
If your blanket is turning out smaller than expected, first check your gauge.
If you are getting more stitches per measurement than the pattern specifies, your stitches are smaller. You may need to try a larger hook.
However, don't change hook size halfway through the project without considering the effect on the completed rows. It is much better to identify the correct hook size during your gauge swatch or at the beginning of the project.
What If My Blanket Is Too Large?
If your blanket is larger than expected, check your gauge.
If you are getting fewer stitches per measurement than the pattern specifies, your stitches are larger. You may need to try a smaller hook.
Again, make this adjustment before beginning the main blanket whenever possible so that the entire project has consistent tension.
Can I Use the Same Hook With Different Yarn Colours?
Yes. Changing colour does not normally require changing your hook.
If you are using the same yarn weight and a similar yarn type throughout the blanket, keep using the same hook size.
This is particularly important for a multi-coloured stitch sampler because keeping the same hook helps maintain consistent stitch size across the different colour sections.
What If Different Colours Feel Slightly Different?
Even within the same yarn range, different colours can sometimes feel slightly different because of the dyeing process.
If one colour feels noticeably thicker, thinner, softer or stiffer than another, make a small test section before committing to an entire row.
Keep your tension consistent and watch your stitch count when changing colours.
What Is the Best Crochet Hook for a Beginner?
For a beginner, a comfortable ergonomic crochet hook is often a good choice because stitch sampler blankets can involve many hours of crocheting.
The most important factors are:
- A hook size appropriate for your yarn
- A comfortable grip
- A smooth hook head
- A hook that allows the yarn to slide easily
- A size that helps you achieve the required gauge
You don't need an expensive hook to make a beautiful stitch sampler blanket. Comfort, correct sizing and consistent tension matter more than the brand of the hook.
Quick Crochet Hook Checklist
- ☐ Have I checked the hook size recommended by my pattern?
- ☐ Have I checked the recommended hook size on my yarn label?
- ☐ Is my yarn weight suitable for the hook?
- ☐ Have I made a gauge swatch if I am changing yarn or hook size?
- ☐ Is my crochet tension relaxed?
- ☐ Does my fabric have the amount of drape I want?
- ☐ Am I using the same hook size throughout the project?
- ☐ Is my stitch count consistent?
The simple rule to remember: choose your yarn first, use the recommended hook as your starting point, check your gauge, and then adjust your hook size if necessary. Once you have found the combination that gives you the right tension and fabric, keep your yarn, hook and tension consistent throughout the stitch sampler blanket.
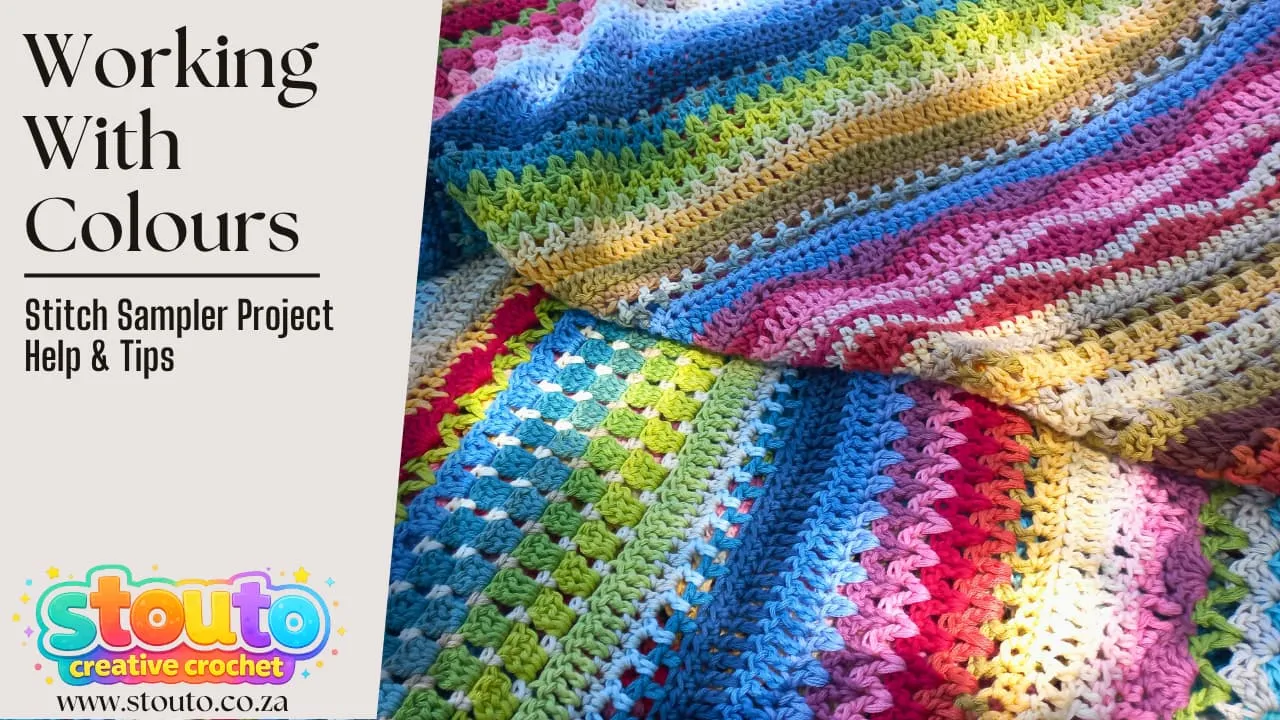
Working With Colours
Colour is one of the things that makes a crochet stitch sampler blanket so much fun to create. You can use a different colour for every row, create repeating colour sequences, work with a rainbow palette, or use leftover yarn from your stash to create a completely unique blanket.
Changing colours is not difficult once you understand where the colour change should happen. The most important thing is to make the colour change neatly, secure the new yarn properly, and keep your row direction consistent.
When working a stitch sampler with a new colour for each row, it is particularly important to pay attention to the last stitch of the old colour, the first stitch of the new colour, the yarn tails, and which direction you are crocheting.
How Do I Change Colours?
The cleanest way to change colour is to change yarn at the final yarn-over of the last stitch worked in the old colour.
This allows the final loop of the old-colour stitch to be completed using the new colour, creating a neat transition between the two colours.
- Work the last stitch of the row or colour section until the final yarn-over remains.
- Drop the old yarn colour.
- Pick up the new yarn colour.
- Yarn over with the new colour.
- Pull the new colour through the final loop to complete the stitch.
- Continue crocheting with the new colour.
This technique is particularly useful when changing colours between rows because the new colour becomes part of the final loop of the previous stitch.
When Should I Change Colour?
For a blanket where each row is a different colour, change colour at the end of the final stitch of the current row.
Do not cut the old yarn until the stitch has been completed and the new colour is securely through the final loop.
If the pattern tells you to change colour at a specific point within a row, always follow the pattern instructions instead.
How Do I Secure a Colour Change?
Once you have changed colours, leave a yarn tail long enough to weave in securely later.
For a new row, Stouto's recommended colour-joining method is to join the new colour with a slip stitch and then work a single crochet over the join to help secure it before beginning the required starting chain.
Keeping the join secure is especially important in blankets because they are handled, washed and used regularly.
How Do I Add a New Ball of Yarn?
When you run out of yarn or need to introduce another colour, you can add a new ball without creating a bulky knot in your crochet.
The basic method is:
- Work the current stitch until two loops remain on the hook.
- Drop the old yarn.
- Place the new yarn over the hook.
- Pull the new yarn through the remaining loops.
- Continue crocheting with the new yarn.
This creates a colour change at the top of the stitch and allows you to continue working without stopping to make a separate knot.
How Much Yarn Should I Leave When Joining a New Ball?
Leave a reasonably long tail on both the old and new yarn. These tails can be woven into the back of the blanket once the row or section is complete.
Avoid leaving extremely short tails because they can be difficult to weave in securely.
Do I Need to Tie a Knot When Adding New Yarn?
You do not necessarily need to tie a knot when changing yarn using a crochet colour-change technique.
The new yarn can be secured by working the colour change correctly and then weaving in the yarn tails securely on the wrong side of the project.
If you prefer to use a knot, make sure it is secure and positioned where it will not create an obvious bump in the finished blanket.
What Do I Do With the Old Yarn?
Once you have changed colour, leave the old yarn tail attached until you are ready to weave in your ends.
At the end of the project, use a yarn needle to weave the tail back and forth through several stitches on the wrong side of the blanket.
Do not rely on simply trimming the tail close to the blanket. A securely woven end is much less likely to come loose during use or washing.
How Do I Start a New Colour for Each Row?
Starting a new colour for every row creates strong horizontal colour changes and works particularly well for stitch sampler blankets.
The Stouto method uses a slip-stitch join followed by a single crochet to secure the new colour before creating the starting chain for the new row.
- Finish the previous row and secure the old colour.
- Cut the old yarn and leave a tail for weaving in later.
- Position your new colour at the beginning of the next row.
- Join the new colour into the top stitch space of the last stitch worked from the previous row using a slip stitch.
- Work 1 single crochet over the slip stitch to help lock the new yarn in place.
- Chain the number of stitches required for the first stitch of the new row.
- Continue working the new row according to the pattern.
The number of starting chains depends on the first stitch of the row.
For example:
- Half double crochet: the pattern example uses chain 2.
- Double crochet: the pattern example uses chain 3.
Always use the turning-chain instructions specified by your particular pattern because different patterns may treat turning chains differently.
How Do I Finish Each Colour Row?
When you have completed a colour row, cut the yarn and pull the yarn through the final loop to secure it.
Leave a tail that is long enough to weave in later.
When you are ready to begin the next row, join the new colour according to the pattern instructions. Stouto's stitch sampler guidance recommends joining the new colour with a slip stitch and then securing the join with a single crochet before working the required starting chain.
Can I Keep the Same Colour Instead?
Yes. You do not have to change colour at the end of every row.
If the next row continues with the same colour, follow the pattern instructions for turning and starting the next row rather than cutting and rejoining the yarn.
Stouto's additional stitch-sampler notes indicate that when continuing with the same colour, you can chain and turn according to the requirements of the next section rather than finishing off the colour.
How Does Row Direction Affect Colour Changes?
Row direction is particularly important when you use a different colour for every row.
When you turn your work, you need to know which side of the blanket you are starting the next row from. If you accidentally begin a new row from the wrong side, your colour sequence, stitch pattern and row orientation may no longer match the instructions.
A simple way to keep track is to use the yarn tail from the previous row as your visual reference.
When the work is turned, the ending yarn tail from the previous row should sit on your right-hand side while you crochet toward the left. This helps you maintain consistent row direction.
Which Side Should the Yarn Tail Be On?
For the Stouto stitch sampler method, when you turn your work to begin the next row, the previous row's yarn tail should be on your right while you work toward the left.
Think of the tail as a quick visual checkpoint:
- Tail on the right: you are positioned correctly to begin the next row.
- Tail on the wrong side: stop and check the direction of your work before continuing.
This simple trick can be particularly helpful when every row uses a different colour and you have many loose yarn tails along the sides of the blanket.
Why Is Row Direction Important in a Stitch Sampler?
Different stitch patterns may have different instructions for their beginning and ending stitches. Some rows may start and finish differently, and some stitch patterns depend on working from a particular side.
Keeping your row direction consistent helps you:
- Follow the written instructions correctly.
- Read the stitch diagram in the correct direction.
- Keep the colour sequence consistent.
- Maintain the correct stitch placement.
- Keep the blanket edges aligned.
Stouto's stitch sampler guidance also recommends paying close attention to the beginning and end of each row because some rows start and finish differently.
How Do I Keep My Colour Changes Neat?
Neat colour changes come from consistent joins, controlled tension and properly finished yarn tails.
For a cleaner-looking blanket:
- Change colour at the correct point in the final stitch.
- Keep your tension consistent when joining the new yarn.
- Use the same joining method throughout the blanket.
- Leave sufficient yarn tails for weaving in.
- Keep track of which side of the blanket you are working from.
- Check your first and last stitches carefully.
- Weave in yarn ends securely when sections are complete.
How Many Colours Should I Use?
There is no fixed number of colours you need to use in a stitch sampler blanket.
For beginners, Stouto suggests starting with three to five colours. Adding a neutral colour can help balance brighter shades, while gradient and rainbow palettes can create a strong visual flow. Self-striping yarn is another option if you want colour variation without changing yarn manually.
You can also use leftover yarn from your stash. Stitch sampler blankets are particularly well suited to scrap yarn because individual rows or stitch sections can use relatively small quantities.
Can I Change My Colour Sequence?
Yes. One of the advantages of a stitch sampler blanket is that you can create your own colour combination.
You can use:
- Rainbow colours
- Three to five coordinated colours
- Pastel shades
- Bright contrasting colours
- Neutral colours
- Neutral colours with bright accent shades
- Leftover yarn from your stash
- Self-striping yarn
If you are following a specific colour sequence, write down your colour changes as you work. This makes it easier to repeat the same sequence or continue it after taking a break.
What If I Run Out of a Colour?
Running out of a particular colour does not mean you have to abandon your project.
If you have enough of another colour that works with your palette, substitute it for the colour you have run out of.
This is one of the reasons stitch sampler blankets are excellent stash-busting projects. You can adapt the colour sequence as your yarn supply changes.
Quick Colour-Change Checklist
- ☐ Have I finished the final stitch of the old colour correctly?
- ☐ Did I change colour at the final yarn-over?
- ☐ Did I leave a long enough yarn tail?
- ☐ Is the new colour securely joined?
- ☐ Did I use the correct starting chain for the new row?
- ☐ Is the yarn tail from the previous row on my right side?
- ☐ Am I working in the correct direction?
- ☐ Did I check the first and last stitches of the new row?
- ☐ Have I recorded my colour sequence?
The simple rule to remember: change colour at the final yarn-over, secure the new colour neatly, use the yarn tail to check your row direction, and keep your colour sequence recorded. Once you get into this rhythm, changing colours row by row becomes a simple and enjoyable part of making a stitch sampler blanket.
US vs. UK Stitch Translation Matrix
Never let terminology ruin a project. In US terms, stitches are named after the yarn overs; in UK terms, stitches are named after the loops on your hook.
US vs. UK Stitches
| Symbol / Chart | Stitch Name | UK Equivalent | Quick Method |
|---|---|---|---|
| ch | Chain Stitch | chain (ch) |
Make a slipknot, yo, pull through loop. Repeat for desired chains. |
| sc | Single Crochet | double crochet (dc) |
1. Insert hook into the next stitch. |
| hdc | Half Double Crochet | half treble crochet (htr) |
1. Yarn over. |
| dc | Double Crochet | treble crochet (tr) |
1. Yarn over. |
| fpdc | Front Post Double Crochet | front post treble crochet (fptr) |
1. Yarn over, insert hook front→back→front around post. |
| bpdc | Back Post Double Crochet | back post treble crochet (bptr) |
1. Yarn over, insert hook back→front→back around post. |
| BLO | Back Loop Only | Back loop only (BLO) |
1. Insert hook under the back loop only (farthest from you). |
| fphdc | Front Post Half Double Crochet | Front post half treble crochet (fphtr) |
1. Yarn over, insert hook front→back→front around post. |
| bphdc | Back Post Half Double Crochet | Back post half treble crochet (bphtr) |
1. Yarn over, insert hook back→front→back around post. |
| bpsc | Back Post Single Crochet | back post double crochet (bpdc) |
1. Insert hook back→front→back around the post of stitch below. |
| puff | Puff Stitch | puff stitch (puff) |
1. Yarn over, insert hook, pull up loop — repeat specified number of times (e.g., 3–5 pulls) so multiple loops on hook. |
| bob | Bobble Stitch | bobble stitch (bob) |
1. Work a number of partial DCs into same stitch (e.g., 5 times), leaving last loop of each on hook. |
| pc | Popcorn Stitch | popcorn stitch (pc) |
1. Work 5 DC in same stitch. |
| sh | Shell Stitch | Shell stitch (sh) |
1. Work 3 dc of any (hdc,dc,tr) into same stitch or space. |
| v st | V Stitch | V-stitch (v st) |
1. Work dc, ch1, dc into same stitch/space. |
| cl | Cluster | cluster stitch (cl) |
1. Yarn over, insert, pull up loop (don’t finish). Repeat partial stitches per cluster (e.g., 3 times). |
| 2dc | 2 Double Crochet | 2 treble crochet (2tr) |
1. Work 1 dc into the stitch (complete as usual). |
| 3dc | 3 Double Crochet | 3 treble crochet (3tr) |
1. Work 3 dc into the same stitch (one after the other). |
| 5dcsh | 5 Double Crochet Shell | 5 treble crochet shell (5trsh) |
1. Work 5 dc into same stitch/space. |
| 5dc-cl | 5 Double Crochet Cluster | 5 treble crochet cluster (5tr-cl) |
Work 5 dc partially, yo, pull through all loops. |
| cross | Crochet Cross | cross stitch (cross) |
1. Insert hook into stitch two ahead (skip one). Yarn over, pull up loop. |
| ch-sp | Chain Space | chain space (ch-sp) |
1. Make a slip knot on the hook. |
| sp before | Space Before | space before (sp before) |
Insert hook in space before marked stitch. |
| sp after | Space After | space after (sp after) |
Insert hook in space after marked stitch. |
| nxt | Next | next stitch (nxt) |
1) Finish current stitch. |
| sts | Stitches | stitches (sts) |
1) Identify the stitch’s top “V”. |
| rep from * | Repeat from * | repeat from * (rep from *) |
1) Find the *. |
| rep rows | Repeat Rows | repeat rows (rep rows) |
Work rows as written for repetition count. |
| yo | Yarn Over | yarn over (yo) |
1) Hold yarn in non-dominant hand. |
| FLO | Front loop only | front loop only (FLO) |
1. Identify top loops of the stitch (front is closest to you). |
| Foundation Row | |||
| Side Saddle Stitch | |||
| Easy Crochet Wave Stitch Pattern (Step-by-Step Tutorial) |
Work in multiples of 6 + 1. Repeat a simple two-row pattern: Row 1 builds the wave shape using sc, hdc, dc, and tr across each 6-stitch repeat. Row 2 mirrors the sequence to complete the ripple. Continue alternating Rows 1 and 2 for the full length of your project. |

Promotions & Special Bundles
Take advantage of our maker promotions, volume discounts, and instant digital downloads.
35% Raverly Sale
Unlock row-by-row blankets, botanical squares, and wearable patterns with instant PDF delivery.
PROMO CODE : STOUTO30OFF
Get 30% off any flower motifs, throw blankets, or cushion patterns on Etsy. Use Promocode .
Open Etsy StoreVIP Maker Direct Delivery Guarantee
- Instant PDF download link right after purchase
- Formatted for home printing & tablet row-checkers
- Free errata notifications and chart expansions
.
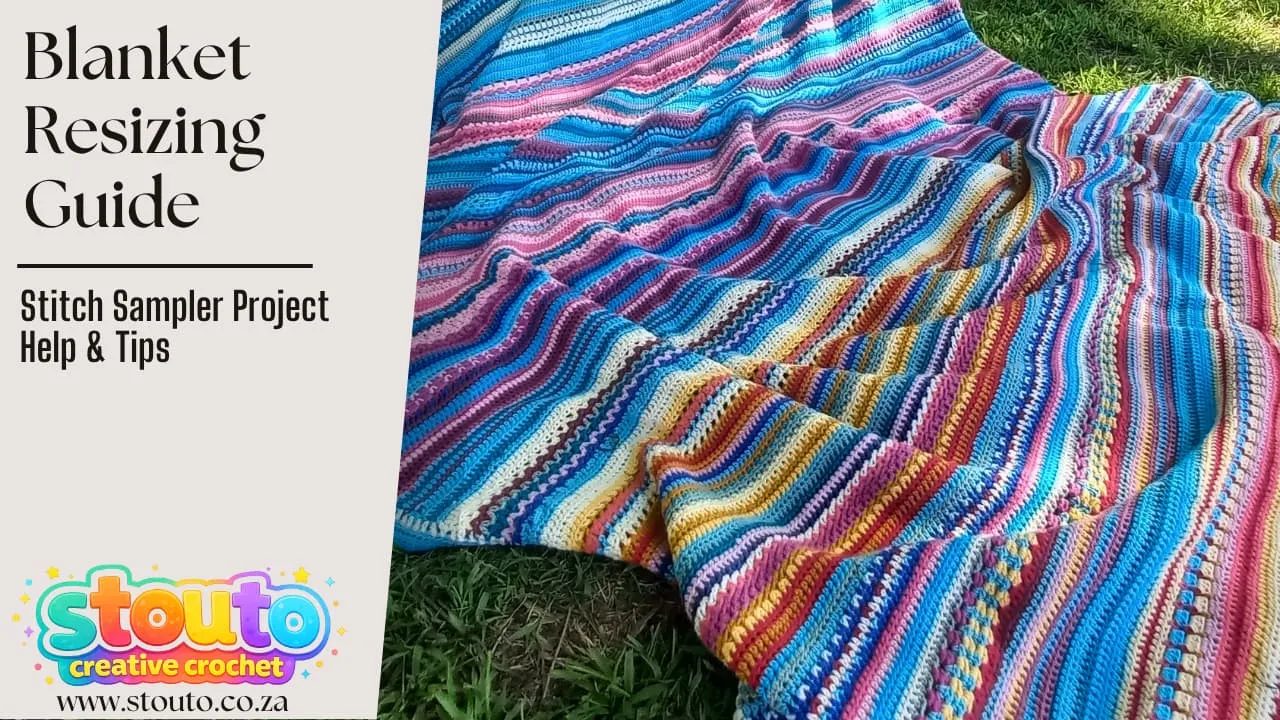
Blanket Resizing Guide
One of the advantages of making a crochet stitch sampler blanket is that you can adjust the size to suit your needs. You may want a small baby blanket, a lap blanket, a larger throw, or a full-size bed blanket.
However, resizing a stitch sampler blanket is slightly different from simply adding or removing stitches. Each stitch pattern usually has a specific stitch repeat, and the starting stitch count needs to work with all of the different stitch patterns used throughout the project.
The easiest way to resize your blanket is to decide on the finished size first, identify the stitch multiple required by the pattern, and then calculate a starting stitch count that works with the stitch sampler.
How Do I Resize a Stitch Sampler Blanket?
To resize a stitch sampler blanket:
- Decide how wide and long you want the finished blanket to be.
- Check the original pattern's stitch count and finished dimensions.
- Determine the stitch multiple required by the stitch sampler.
- Adjust the starting stitch count while keeping the required stitch multiple.
- Make a gauge swatch using your chosen yarn and hook.
- Measure your swatch and calculate the number of stitches needed for your desired width.
- Choose the nearest stitch count that satisfies the pattern's stitch multiple.
- Adjust the number of rows to achieve your desired length.
- Check the blanket measurements as you work.
The most important rule is to preserve the stitch repeat. Do not simply add a random number of stitches to make the blanket wider.
Can I Make a Stitch Sampler Blanket Bigger or Smaller?
Yes. Stitch sampler blankets can be resized, but you need to maintain the stitch multiples required by the individual stitch patterns.
For example, if a stitch pattern requires a multiple of 12 stitches, you cannot simply add 5 stitches to the starting chain. The additional stitches need to fit the repeat so that the stitch pattern remains correctly aligned.
Many stitch sampler patterns also include one or more additional stitches for the edges. These edge stitches need to be included in your calculation.
What Stitch Multiple Do I Need When Resizing?
The stitch multiple is the number of stitches that a particular stitch pattern repeats across the row.
For the Stouto stitch sampler blanket, the resizing guide uses sets of 12 stitches plus 2 edge stitches.
This means that your starting stitch count can be calculated using:
(12 × number of repeats) + 2 edge stitches
For example:
- 12 × 10 repeats + 2 = 122 stitches
- 12 × 11 repeats + 2 = 134 stitches
- 12 × 12 repeats + 2 = 146 stitches
- 12 × 13 repeats + 2 = 158 stitches
- 12 × 14 repeats + 2 = 170 stitches
Use the stitch multiple specified by your particular pattern. If you are working from the Stouto stitch sampler pattern, use the required 12-stitch repeat + 2 edge stitches.
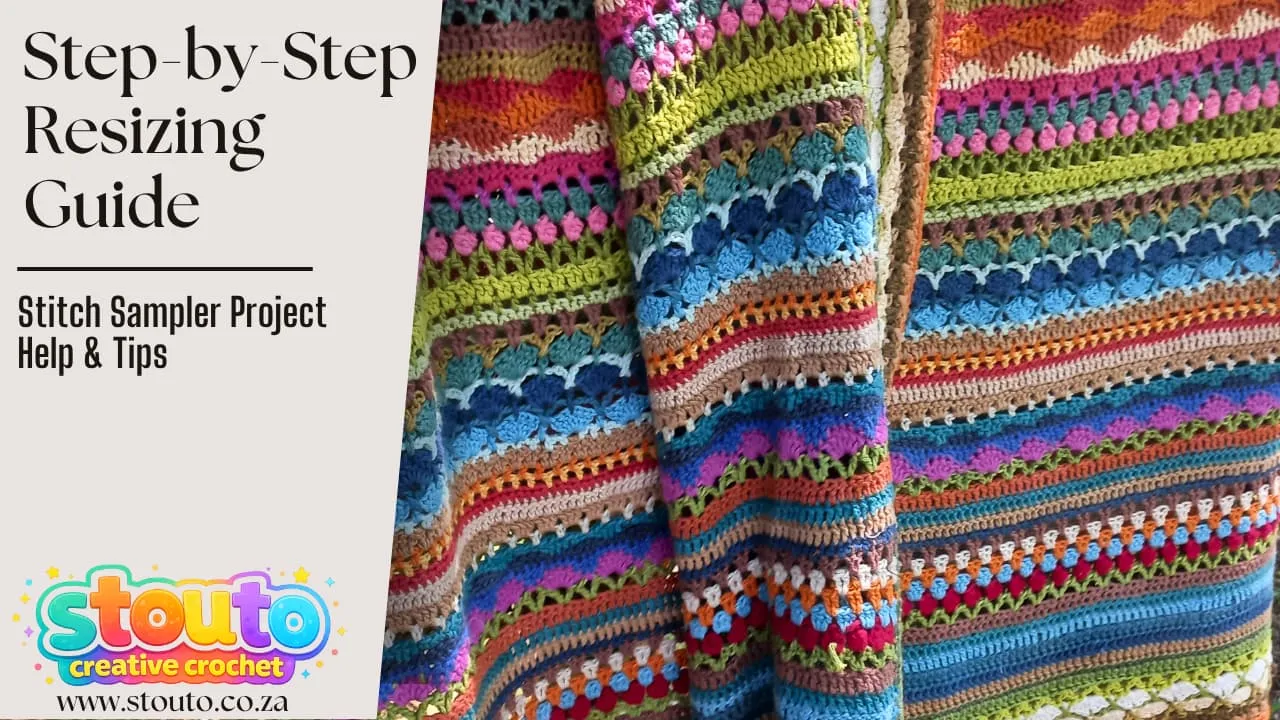
Step-by-Step Resizing Guide
Follow these steps when you want to change the finished size of your stitch sampler blanket.
Step 1: Decide What Size Blanket You Want
Start with the finished dimensions rather than the number of stitches.
Decide whether you want a:
- Baby blanket
- Small throw
- Lap blanket
- Standard throw
- Large throw
- Bed blanket
Measure the space where you intend to use the blanket if you need a specific finished size.
Remember that the final dimensions can vary slightly because of yarn choice, crochet tension, blocking and the stitch patterns used.
Step 2: Check the Original Pattern Dimensions
Use the original blanket measurements as your starting point.
The Stouto Stitch Sampler Blanket example is approximately 72 × 92 inches (185 × 235 cm).
The original project uses DK yarn, a 4 mm crochet hook, 206 stitches per row and 141 rows.
These measurements provide a useful reference when deciding how much larger or smaller you want your own blanket to be.
Step 3: Check Your Stitch Multiple
Before changing the stitch count, identify the repeat required by the pattern.
For the Stouto stitch sampler, the resizing structure is:
12-stitch repeat + 2 edge stitches
Keeping this structure ensures that the stitch patterns can be worked correctly across the width of the blanket.
Step 4: Make a Gauge Swatch
Before calculating your new starting chain, make a gauge swatch using the yarn and crochet hook you intend to use.
Measure how many stitches you get over a known measurement, such as 10 cm or 4 inches.
Your personal crochet tension can make your stitches larger or smaller than the pattern, so your gauge is more useful for resizing than simply copying the original stitch count.
Step 5: Calculate Your Starting Stitch Count
Use your gauge to estimate how many stitches you need for your desired blanket width.
For example, if your gauge produces 18 stitches over 10 cm and you want a blanket approximately 100 cm wide:
100 ÷ 10 × 18 = 180 stitches
However, you cannot automatically use 180 stitches for the Stouto stitch sampler because the pattern requires a 12-stitch repeat plus 2 edge stitches.
Choose the nearest suitable stitch count:
12 × 15 + 2 = 182 stitches
Your starting stitch count would therefore be approximately 182 stitches, subject to checking your actual swatch and the pattern instructions.
Step 6: Choose the Nearest Valid Stitch Count
Once you have estimated the number of stitches required for your desired width, round the number up or down to the nearest stitch count that satisfies the required repeat.
For the Stouto stitch sampler:
Starting stitches = (12 × repeats) + 2
Do not choose a stitch count simply because it produces the exact width on paper. The stitch pattern needs to remain mathematically correct.
Step 7: Work the Foundation Row
Once you have selected your stitch count, work the foundation chain and first row according to the pattern instructions.
Count your stitches carefully.
This is the best point to catch a mistake. If your stitch count is incorrect in the foundation row, the error can affect every subsequent stitch pattern.
Step 8: Check the Width Before Continuing
Lay your foundation row or first completed row flat and measure it.
Compare the measurement with your target width.
If it is significantly different from what you expected, check your gauge before continuing with the entire blanket.
Step 9: Adjust the Number of Rows for the Length
Once your width is correct, adjust the number of rows to achieve your desired length.
Unlike the width, the length does not normally require a stitch multiple. You can usually add or remove complete rows or stitch sections according to the structure of the pattern.
However, if the pattern contains a repeating sequence of stitch rows, try to finish at a logical point in that sequence so the design remains balanced.
Step 10: Measure the Blanket as You Work
Do not wait until the blanket is finished to check the size.
Measure your project periodically because crochet fabric can change slightly as more rows are added.
Lay the blanket flat without stretching it and measure from edge to edge.
How Do I Make the Blanket Wider?
To make the blanket wider, increase the number of stitch repeats across the row.
For the Stouto stitch sampler, add complete 12-stitch repeats rather than adding individual stitches.
For example:
- 10 repeats = 122 stitches
- 12 repeats = 146 stitches
- 15 repeats = 182 stitches
- 20 repeats = 242 stitches
This allows the stitch sampler patterns to remain aligned while increasing the width of the blanket.
How Do I Make the Blanket Narrower?
To make the blanket narrower, remove complete stitch repeats rather than individual stitches.
Using the Stouto resizing structure, remove one or more groups of 12 stitches while keeping the 2 edge stitches.
This keeps the stitch pattern mathematically correct.
How Do I Make the Blanket Longer?
To make the blanket longer, add additional rows or repeat sections of the stitch sampler.
If the pattern consists of a sequence of different stitches, consider repeating a complete group of rows rather than adding random individual rows.
This keeps the visual rhythm of the blanket consistent.
How Do I Make the Blanket Shorter?
To make the blanket shorter, work fewer rows or omit complete stitch sections where the pattern allows it.
If the blanket has a carefully planned sequence, avoid removing a single row from the middle of a stitch sequence unless the pattern specifically allows it.
It is usually better to remove a complete repeat or section so that the overall design remains balanced.
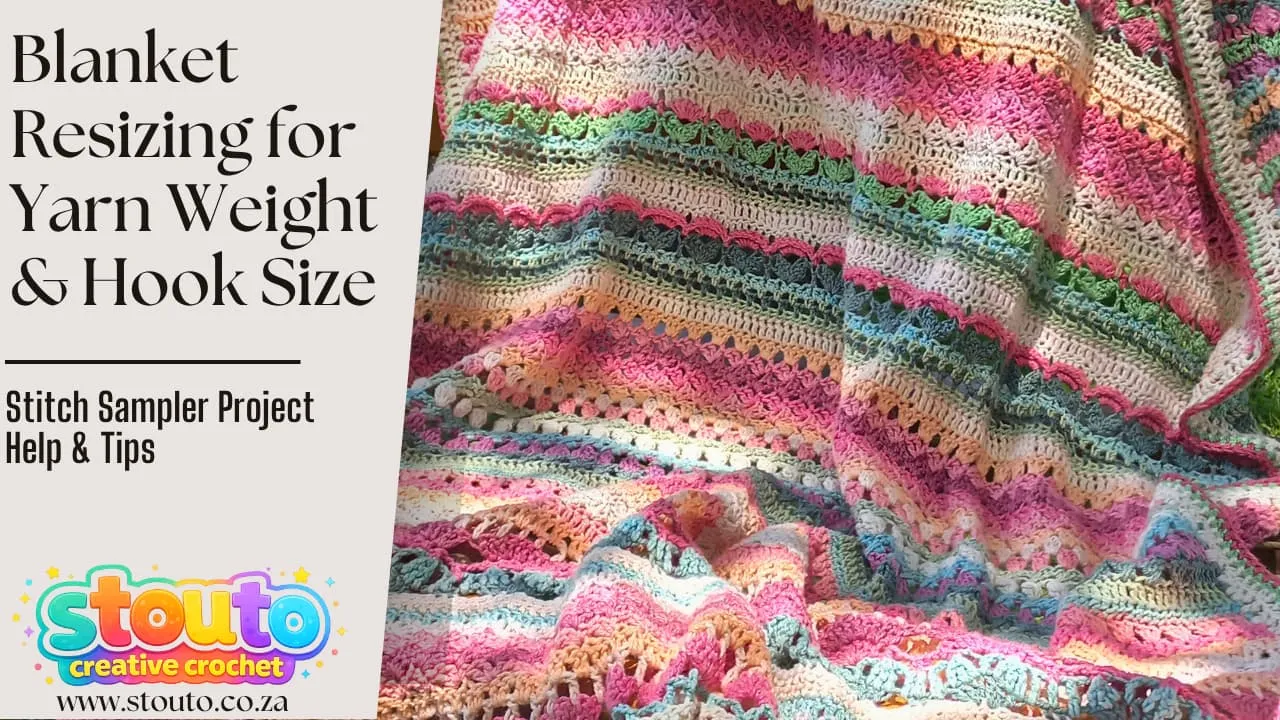
Blanket Resizing for Yarn Weight & Hook Size
Changing yarn weight or crochet hook size can change the finished dimensions of your blanket even if you use exactly the same stitch count and number of rows.
This means that resizing should always take yarn weight, hook size and crochet gauge into account.
What Happens If I Use a Different Yarn Weight?
Changing yarn weight changes the size of your stitches and therefore changes the finished dimensions of the blanket.
A lighter yarn generally produces smaller stitches and a lighter fabric, while a heavier yarn generally produces larger stitches and a thicker, heavier fabric.
If you use a different yarn weight from the original pattern, make a gauge swatch before calculating your new stitch count.
Can I Resize the Blanket by Changing the Crochet Hook?
You can change the hook size, but this should not be your only method of resizing the blanket.
A larger hook generally produces larger and looser stitches, while a smaller hook produces smaller and tighter stitches.
Changing hook size also changes the fabric's drape and density, so the finished blanket may not feel the same even if the final dimensions are correct.
If you need to deliberately resize the blanket, it is usually better to adjust the number of stitch repeats and rows while keeping a suitable yarn and hook combination.
What If I Use a Heavier Yarn?
Heavier yarn generally creates larger stitches, so the same number of stitches can produce a wider blanket.
It will also create a thicker and heavier fabric and may require a larger crochet hook.
Make a new gauge swatch and calculate your stitch count based on the new gauge rather than using the original stitch count unchanged.
What If I Use a Lighter Yarn?
Lighter yarn generally creates smaller stitches, so the same number of stitches can produce a narrower blanket.
The resulting blanket will usually be lighter and may have more drape.
Again, make a gauge swatch and calculate the required number of stitch repeats for your desired width.
Can I Use the Same Stitch Count With a Different Yarn?
You can, but the finished size will probably change.
If you use the same stitch count with a different yarn weight, the stitches will generally be a different size.
If maintaining a particular finished size is important, use your new gauge to calculate the appropriate stitch count while preserving the pattern's stitch multiple.
Can I Use a Different Hook With the Same Yarn?
Yes. A different hook size can be used with the same yarn to adjust your gauge.
If your stitches are too tight and your blanket is smaller than expected, you may need to try a larger hook.
If your stitches are too loose and your blanket is larger than expected, you may need to try a smaller hook.
Always test the new hook on a swatch before changing the hook for the entire project.
What Is the Best Way to Resize a Blanket?
The most reliable approach is to resize by stitch repeats rather than randomly changing stitch counts.
Use this sequence:
- Choose your desired finished width and length.
- Choose your yarn.
- Choose an appropriate crochet hook.
- Make a gauge swatch.
- Calculate the approximate number of stitches required for your width.
- Adjust that number to the required stitch multiple.
- Work your foundation row.
- Check the width.
- Work the stitch sampler rows.
- Add or remove rows to achieve your desired length.
- Measure periodically as you work.
What Should I Check Before Starting a Resized Blanket?
- ☐ Have I decided on my finished blanket dimensions?
- ☐ Have I checked the original pattern dimensions?
- ☐ Do I know the required stitch multiple?
- ☐ Am I including the required edge stitches?
- ☐ Have I chosen my yarn weight?
- ☐ Have I chosen my crochet hook?
- ☐ Have I made a gauge swatch?
- ☐ Have I calculated my approximate stitch count?
- ☐ Does my final stitch count satisfy the pattern repeat?
- ☐ Have I checked the width after the foundation row?
- ☐ Have I planned how many rows or stitch sections I need?
- ☐ Am I measuring the blanket as I work?
Stitch Sampler Resizing Tip
When resizing a stitch sampler blanket, always adjust in complete stitch repeats. For the Stouto stitch sampler, the repeat is 12 stitches plus 2 edge stitches. This allows you to make the blanket wider or narrower while keeping the stitch patterns correctly aligned.
For the length, adjust the number of rows or complete stitch sections while keeping the overall sequence balanced.
Step-by-Step
Browse through each row below or follow along round-by-round at your own pace.
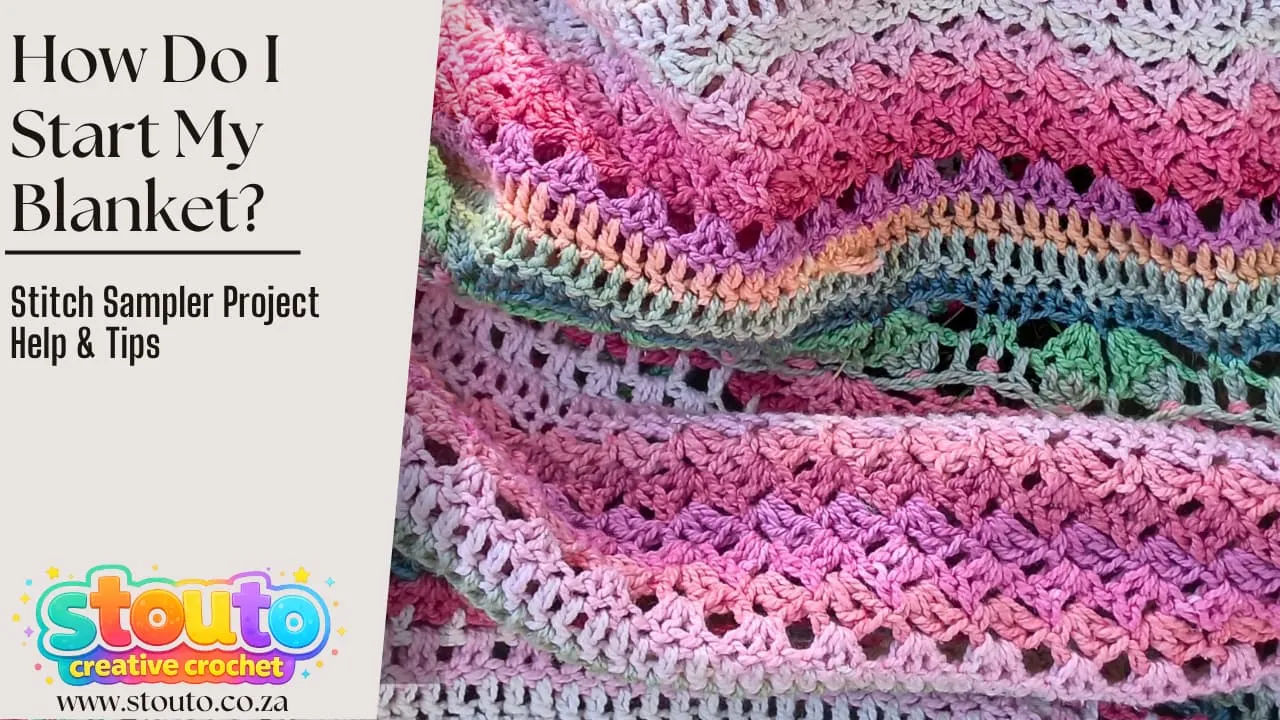
How Do I Start My Blanket?
Starting a crochet stitch sampler blanket correctly is important because your foundation chain and first row form the base for everything that follows. If the starting chain is too tight, the stitch count is incorrect, or the foundation row is worked into the wrong loops, problems can continue throughout the entire blanket.
Before making your first chain, take a few minutes to check your yarn, crochet hook, gauge, blanket size, stitch multiple and pattern instructions. Once these are correct, the foundation row becomes much easier to work.
For the Stouto stitch sampler blanket, the original project uses DK yarn, a 4 mm crochet hook and 206 stitches per row. The blanket is approximately 72 × 92 inches (185 × 235 cm), with 141 rows. If you are resizing the blanket, your starting stitch count will need to follow the required stitch repeat.
What Do I Need to Know Before Making My Starting Chain?
Before you make your starting chain, check the pattern carefully. The foundation chain is not simply a matter of making enough chains to reach the desired width. Your stitch sampler needs the correct number of stitches so that every stitch pattern can be worked correctly.
Before starting, check:
- Yarn weight: Make sure your yarn is suitable for the project.
- Hook size: Check the recommended crochet hook and adjust if necessary for your gauge.
- Gauge: Make a swatch if you are changing yarn or hook size.
- Finished size: Decide how large you want your blanket to be.
- Stitch multiple: Check the stitch repeat required by the pattern.
- Edge stitches: Make sure any additional edge stitches are included in your calculation.
- Starting chain: Check whether the pattern's stitch count refers to chains, stitches or both.
- Turning chain: Check how many chains are required to begin the first row.
For the Stouto stitch sampler resizing system, the stitch repeat is based on 12 stitches plus 2 edge stitches. This means your starting stitch count should follow the formula:
(12 × number of repeats) + 2 edge stitches
Always follow the specific stitch multiple given in the pattern you are using.
How Do I Calculate My Starting Chain?
If your pattern gives you a specific starting stitch count, use that number unless you are intentionally resizing the blanket.
If you are resizing, first calculate how many stitches you need for your desired width based on your gauge. Then adjust the number to the nearest valid stitch multiple required by the stitch sampler.
For the Stouto stitch sampler, use:
12 × repeats + 2 edge stitches
For example:
- 10 repeats = 122 stitches
- 12 repeats = 146 stitches
- 15 repeats = 182 stitches
- 17 repeats = 206 stitches
- 20 repeats = 242 stitches
This allows the stitch patterns to repeat correctly across the width of the blanket.
Starting Chain and Starting Row Tips
Your starting chain should be even and relaxed. One of the most common beginner problems is making the chain too tightly, which can cause the first row to pull in and make the blanket narrower along the bottom edge.
Try to keep the tension of every chain similar. Do not pull the yarn tightly after making each chain.
Helpful starting-chain tips:
- Keep your tension relaxed.
- Use a larger hook for the foundation chain if you naturally crochet very tightly, then switch back to the recommended hook for the first row if the pattern allows it.
- Count your chains carefully.
- Place stitch markers at useful intervals when working a long foundation chain.
- Check your total count before starting the first row.
- Make sure the chain has not twisted before beginning the row.
For a long blanket foundation chain, counting can become surprisingly difficult. Counting in groups can make it easier to keep track of your stitches.
How Do I Work the Foundation Row?
The foundation row is the first actual row of crochet worked into your starting chain. The exact stitches and placement depend on the pattern, but the basic process is the same: create your starting chain, establish the required turning chain, and work the specified stitches into the foundation chain.
- Make the required starting chain.
- Count the chain carefully.
- Check that the chain is not twisted.
- Work the required turning chain if the pattern calls for one.
- Identify the correct chain to work your first stitch into.
- Work across the foundation chain following the pattern.
- Keep your tension consistent.
- Count your stitches as you work.
- Check the final stitch carefully.
- Count the completed row before continuing.
The first stitch may be worked into a particular chain depending on the stitch being used and the pattern's instructions. Always follow the written pattern rather than assuming every row starts in the same chain.
Save this page
Pin this page.
Promotions & Special Bundles
Take advantage of our maker promotions, volume discounts, and instant digital downloads.
35% Raverly Sale
Unlock row-by-row blankets, botanical squares, and wearable patterns with instant PDF delivery.
PROMO CODE : STOUTO30OFF
Get 30% off any flower motifs, throw blankets, or cushion patterns on Etsy. Use Promocode .
Open Etsy StoreVIP Maker Direct Delivery Guarantee
- Instant PDF download link right after purchase
- Formatted for home printing & tablet row-checkers
- Free errata notifications and chart expansions
Explore More Crochet Tutorials on the Website
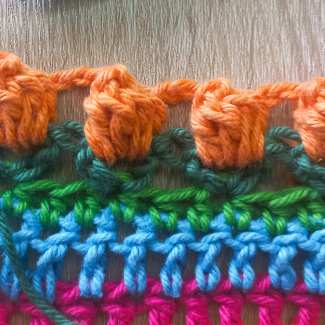
Related Patterns

About the Designer
Hi, I'm Linda, the designer behind Stouto Creative Crochet. I create original crochet patterns inspired by colour, texture, and the joy of handmade crafts.
Each pattern is personally designed, written, tested, and photographed to provide clear instructions and an enjoyable crochet experience. My goal is to help crocheters of all skill levels create beautiful projects they can be proud of.
Discover more crochet patterns, tutorials, and creative resources from Stouto Creative Crochet.