Fiorone Crochet Flower Granny Square Pattern
Crochet Pattern

Posted by :
Stoutomaster
4.95 (142 reviews)
Updated Sep 2026
Fiorone Crochet Flower Granny Square Pattern
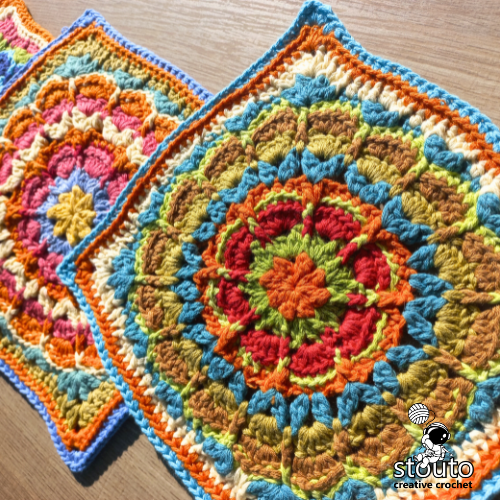
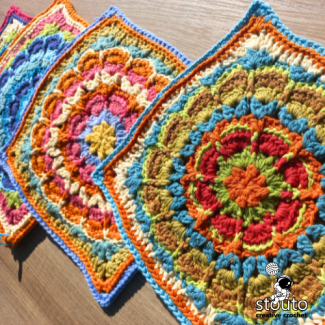
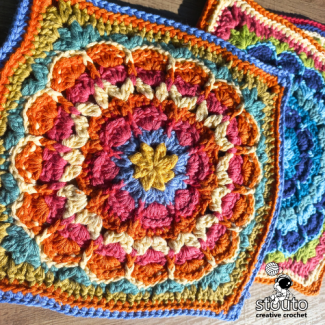
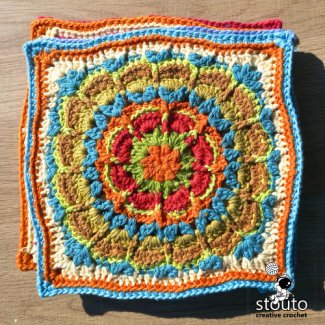
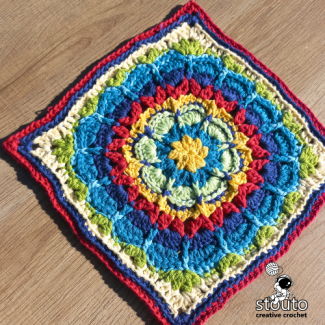
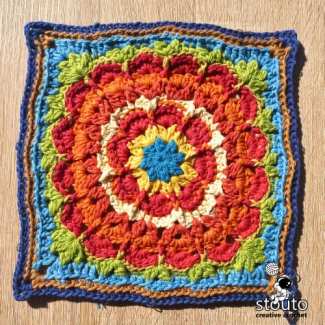
The Fiorone Crochet Flower Granny Square Pattern is a textured granny square flower crochet pattern featuring a dimensional flower centre, raised post stitches and structured corners. The motif begins as a circular flower and gradually transforms into a classic crochet square, making it ideal for blankets, afghans, cushions, bags and other crochet projects.
Designed for beginners who are comfortable with basic crochet stitches and confident beginners ready to explore post stitches and cluster stitches, Fiorone combines traditional granny square construction with a more dimensional floral design.
HOOK
3mm Crochet Hooks
YARN
Double Crochet (DK) Cotton Yarn
Cotton–Acrylic Blends
ALSO AVAILABLE ON:
INTRODUCTION
About This Pattern
Fiorone Crochet Flower Granny Square
The Fiorone design begins with a circular flower centre and gradually develops into a square through a series of textured crochet rounds.
The construction makes the square especially interesting to crochet because the shape doesn't simply start as a traditional square. Instead, the flower motif grows outward before four defined corners are introduced, transforming the circular design into a square.
This gives the finished square a distinctive floral appearance while keeping the construction practical for larger crochet projects.
What makes the Fiorone square special?
- Dimensional crochet flower centre
- Textured front post stitches
- Cluster stitch details
- Clearly defined flower petals
- Four structured square corners
- Optional colour changes
- Suitable for crochet blankets and afghans
- Designed using standard US crochet terminology
- Includes written instructions and charted pattern information
Granny Square Flower Crochet Pattern
If you are looking for a granny square flower crochet pattern with more texture than a simple traditional granny square, Fiorone is designed to give you exactly that.
The flower is created through a combination of clusters, shells, chain spaces and post stitches. As the rounds progress, the floral centre becomes more structured before transforming into the finished square.
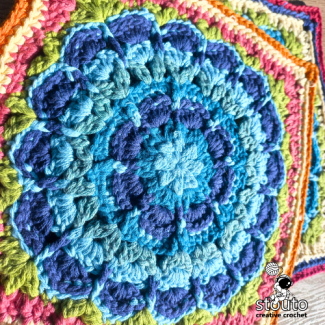
The raised stitches are particularly effective when worked in contrasting colours, helping the petals and flower structure stand out from the surrounding stitches.
Colour changes are completely optional. You can make the entire square in one colour for a more subtle textured effect, or use several colours to emphasise each stage of the flower.
COMPLETE PROJECT INVENTORY
Materials, Yardage Breakdown & Fiber Selection
Engineered for stash-busting joy or a disciplined heirloom palette. Every yardage estimate includes our recommended 10% tension buffer so you never run out on round 6 of the final corner.
Disclosure: As an Amazon Associate, I earn from qualifying purchases.
Notes
Material Notes
All you need to know about materials required for this project.
Crochet Hook
Recommended crochet hook: 3mm
Use the same crochet hook size throughout your project to help maintain consistent square dimensions.
Yarn Weight
Yarn weight: Double Knit
For the sample shown, Light or Medium Weight Yarn was used.
Smooth yarns are particularly effective for this design because they allow the flower stitches, clusters and post stitches to stand out clearly.
Yarn Used in the Example
Yarn: Light or Medium Weight Yarn
Smooth, clearly defined yarn works especially well for the Fiorone square. Highly textured or fluffy yarns can hide some of the detail created by the front post stitches and cluster stitches.
Yarn Usage
The amount of yarn required will vary depending on your yarn weight, crochet hook, tension and finished square size.
The following figures are intended as a practical guide for planning a larger project.
Average yarn usage for 1 flower square
Approximately: 150 - 160 m /165 - 175 yards
Average yarn usage for 3 flower squares
Approximately: 150 - 160 m /165 - 175 yards
Yarn required for 24 flower squares
Approximately:3720 m / 4068 yards
Yarn Tip: If you are making a blanket, it is always a good idea to allow a little extra yarn for joining, colour changes, weaving in ends and differences in individual crochet tension.
MAKER STUDIO LAB
Interactive Yarn & Sizing Calculator
Planning a custom baby blanket, lapghan, or super king bedspread? Adjust dimensions below to instantly calculate square counts, skeins needed, and total meters with our built-in yarn tension buffer.
Limited-Time Deals
Promotions & Special Bundles
Take advantage of our maker promotions, volume discounts, and instant digital downloads.
Website Direct Sale
Ends: Promotion ends :
35% Raverly Sale
Unlock row-by-row blankets, botanical squares, and wearable patterns with instant PDF delivery.
APPLY COUPON AT CHECKOUT:
No code needed
Etsy Store Exclusive
Save 30% Auto
PROMO CODE : STOUTO30OFF
Get 30% off any flower motifs, throw blankets, or cushion patterns on Etsy. Use Promocode .
Open Etsy Store
Over 847 ★★★★★ reviews
Direct PDF Perks
Lifetime Access
VIP Maker Direct Delivery Guarantee
- Instant PDF download link right after purchase
- Formatted for home printing & tablet row-checkers
- Free errata notifications and chart expansions
NOTES
Pattern Notes
Colour Changes
Colour changes are optional, but they are highly recommended for this design.
Using different colours can make the flower petals much easier to see and can emphasis the dimensional structure created by the post stitches.
You could use:
- One colour for the complete square
- One colour for the flower and another for the background
- A different colour for each flower round
- Coordinating colours for a multicoloured blanket
- A neutral background with brightly coloured flowers
The Fiorone square is particularly suitable for mix-and-match blanket designs because changing the colour arrangement can give the same pattern a completely different appearance.
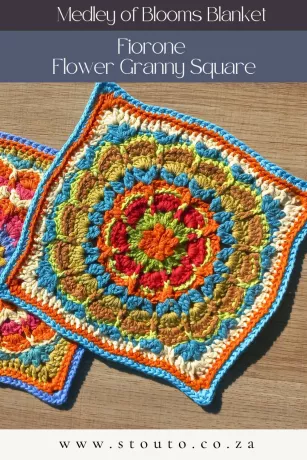
The Fiorone crochet flower granny square is worked in the round with the right side (RS) facing at all times.
Unless otherwise stated, each round is joined with a slip stitch at the end of the round.
Starting chains may count as stitches where specified in the instructions.
Pay particular attention to the chain spaces, as they are used to position many of the clusters, shells and corner stitches.
Important construction notes
- Keep your tension reasonably consistent throughout.
- Count your repeats as you work.
- Use stitch markers if you find it difficult to identify the four corners.
- Pay particular attention to post-stitch placement.
- Keep your chain spaces open and easy to identify.
- When changing colours, finish each round securely before beginning the next.
Gauge Tip
When making multiple Fiorone squares for a blanket, stick to the same yarn weight and crochet hook size for every square.
Even a small difference in yarn thickness, hook size or crochet tension can cause squares to finish at different sizes.
If your squares will be joined together, making a gauge or test square before producing a large quantity can save considerable time later.
Blanket Tip: If one square is slightly larger than another, don't immediately assume the pattern is wrong. Compare your yarn, hook size and tension first.
Finishing Tip
Work your yarn ends in as you go.
It saves hours later...
Unless you really enjoy spending a full day weaving in ends!
With a multicoloured granny square project, dealing with the yarn tails after every square can quickly become one of the biggest finishing jobs. Taking a few minutes to secure and weave in your ends after each round keeps the project much more manageable.
SIZING
Size Information
Finished Square Size
The finished size of your Fiorone crochet square will depend on your yarn, hook size and individual tension.
Finished Square Size
Approximately: 20 cm × 20 cm (8” × 8”) before blocking
For the most consistent results when making multiple squares, use the same yarn weight and crochet hook size throughout the project.
LAYOUTS
Construction Guide
Skill Level
Beginner to Confident Beginner
The Fiorone crochet flower square is suitable for beginners who are already comfortable with basic crochet stitches and working in the round.
Beginners should be comfortable with:
- Working in the round
- Making a magic ring
- Chain stitches
- Single crochet
- Half double crochet
- Double crochet
- Slip stitches
- Following repeated stitch sequences
Confident beginners may enjoy learning:
- Front post stitches
- Back post stitches
- Cluster stitches
- Shell stitches
- Chain-space construction
- Structured flower motifs
- Building a square from a circular centre
Confident beginners who are familiar with post stitches will especially enjoy this pattern because the raised stitches are an important part of the flower's texture.
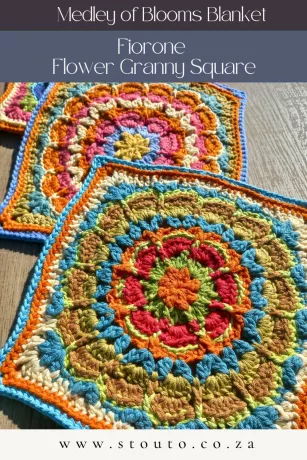
How the Fiorone Flower Granny Square Is Constructed
The pattern is worked entirely in the round, with the right side (RS) facing throughout.
The first rounds establish the centre of the flower. Cluster stitches and shell sections are then built around the centre to create the petals and surrounding texture.
As the motif grows, front post stitches add raised definition to the flower.
The most interesting transformation takes place when the circular motif begins to become a square.
Four distinct corners are introduced, allowing the flower motif to transition naturally from a circular centre into a square shape.
The final rounds then reinforce the square and create a neat outer edge.
Fiorone Crochet Flower Granny Square – Round Overview
The square is built progressively through 13 rounds.
Rounds 1–4 – Flower Centre
The first four rounds establish the central flower motif using:
- Cluster stitches
- Chain-2 spaces
- Double crochet shells
- Front and back post stitches
These rounds create the foundation for the raised flower texture.
Rounds 5–6 – Petal Definition
Raised front post stitches and cluster stitches add additional structure to the flower.
These rounds begin to separate and define the individual floral sections.
Rounds 7–9 – Outer Flower
Shell stitches and front post stitches expand the motif and create the textured outer portion of the flower.
Round 9 introduces a back-loop-only single crochet round, creating a visible ridge that helps define the edge of the circular motif.
Round 10 – Circle to Square
This is the key transformation round.
Four corners are introduced using groups of cluster stitches and chain spaces.
The circular flower now begins to take on a square shape.
Rounds 11–13 – Build the Square
The final three rounds strengthen the four corners and create the straight sides of the square.
The last round is worked through the back loop only, creating a subtle raised ridge around the finished square.
Beginner Troubleshooting
My motif is curling
Some curling is normal during the earlier rounds. The motif should begin flattening as the later rounds are added.
My square doesn't look square in Round 10
Make sure the four corner sections are worked correctly. The ch-2 spaces are the four actual corners. The sides should fall between those four points.
My corners are too tight
Avoid pulling your stitches too tightly around the corner spaces. The ch-2 corner space needs enough room to accommodate the corner stitches in the following rounds.
I keep losing my place
Place a stitch marker in each of the four corner spaces once Round 10 is complete. This makes the later rounds much easier to follow.
My stitch count is different
Check the skipped stitches first, especially in Rounds 6, 8 and 10. Also remember that some starting chains count as stitches, while chain spaces do not.
The Construction of the Design
The clever part of this motif is the way the design changes shape.
- Rounds 1–4 establish the circular centre.
- Rounds 5–9 add texture, shells and raised stitches while gradually expanding the motif.
- Round 10 introduces four deliberate corner points. This is what changes the design from a circle into a square.
- Rounds 11–13 reinforce those four corners and create the straight sides and finished border.
So rather than trying to force a circle into a square, the pattern builds the square gradually through the stitch placement.
INSTRUCTIONS
Pattern Instructions
This pattern is written and charted using standard US crochet terminology.
A complete abbreviation table and stitch glossary are included in the PDF pattern.
Techniques Used
The Fiorone flower square combines several techniques to create its textured floral design.
Working in the Round
The motif begins at the centre and grows outward, with each round building on the previous round.
Cluster Stitches
Cluster stitches are used to create compact, dimensional sections within the flower.
Chain-Space Construction
Chain spaces provide clearly defined areas for working shells, clusters and corner stitches.
Front Post Stitches
Front post stitches are used to create raised texture and help define the flower petals and surrounding structure.
Back Loop Only Stitches
BLO stitches create subtle ridges and texture while also helping define specific sections of the motif.
Colour Joining & Finishing
The pattern includes multiple opportunities for colour changes. Secure joining and neat finishing help keep the finished squares looking clean and consistent.
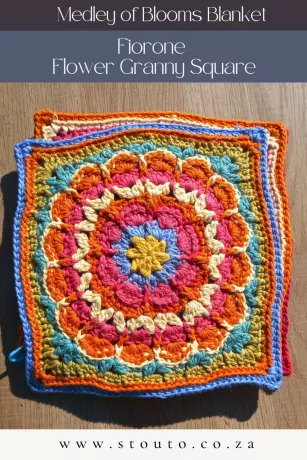
Tips for Making Multiple Fiorone Squares
Planning to turn your flower squares into a blanket?
Here are a few things that will make the process easier.
Make one complete test square first
Before making 24 or more squares, crochet one complete square using your chosen yarn and hook.
Measure the finished square before committing to the full blanket.
Keep your tension consistent
Try to crochet the squares with a similar tension throughout.
If some squares are noticeably tighter or looser, they may not line up neatly when joined.
Keep your colour plan simple
A repeated colour sequence can make a large blanket look cohesive, while randomly changing colours can create a more spontaneous patchwork effect.
Block if necessary
If your finished squares are slightly uneven, gentle blocking can help bring them to a more consistent size before joining.
Ideas for Using Fiorone Crochet Flower Squares
The Fiorone flower square doesn't have to become a blanket.
Use individual squares or groups of squares to create:
- Crochet blankets
- Granny square afghans
- Cushion covers
- Pillow fronts
- Table runners
- Bags
- Crochet throws
- Wall hangings
- Decorative panels
- Mix-and-match patchwork projects
The dimensional flower centre also makes the square interesting enough to use as a standalone motif.
Make Your Own Fiorone Flower Granny Square
If you enjoy floral crochet patterns with texture and dimension, the Fiorone Crochet Flower Granny Square Pattern is a fun project to add to your crochet collection.
The pattern starts with a simple circular flower centre and gradually introduces more texture, raised stitches and structured corners until the motif becomes a finished square.
Whether you make one square as a small crochet project or create dozens for a larger blanket, the Fiorone design gives you plenty of opportunities to experiment with colour.
Ready to crochet your own Fiorone flower granny squares?
Upgrade to the Ad Free PDF Pattern - Shop PDF pattern on Etsy
Create your own textured floral squares and combine them into a beautiful handmade blanket, afghan or patchwork crochet project.
DIAGRAMS
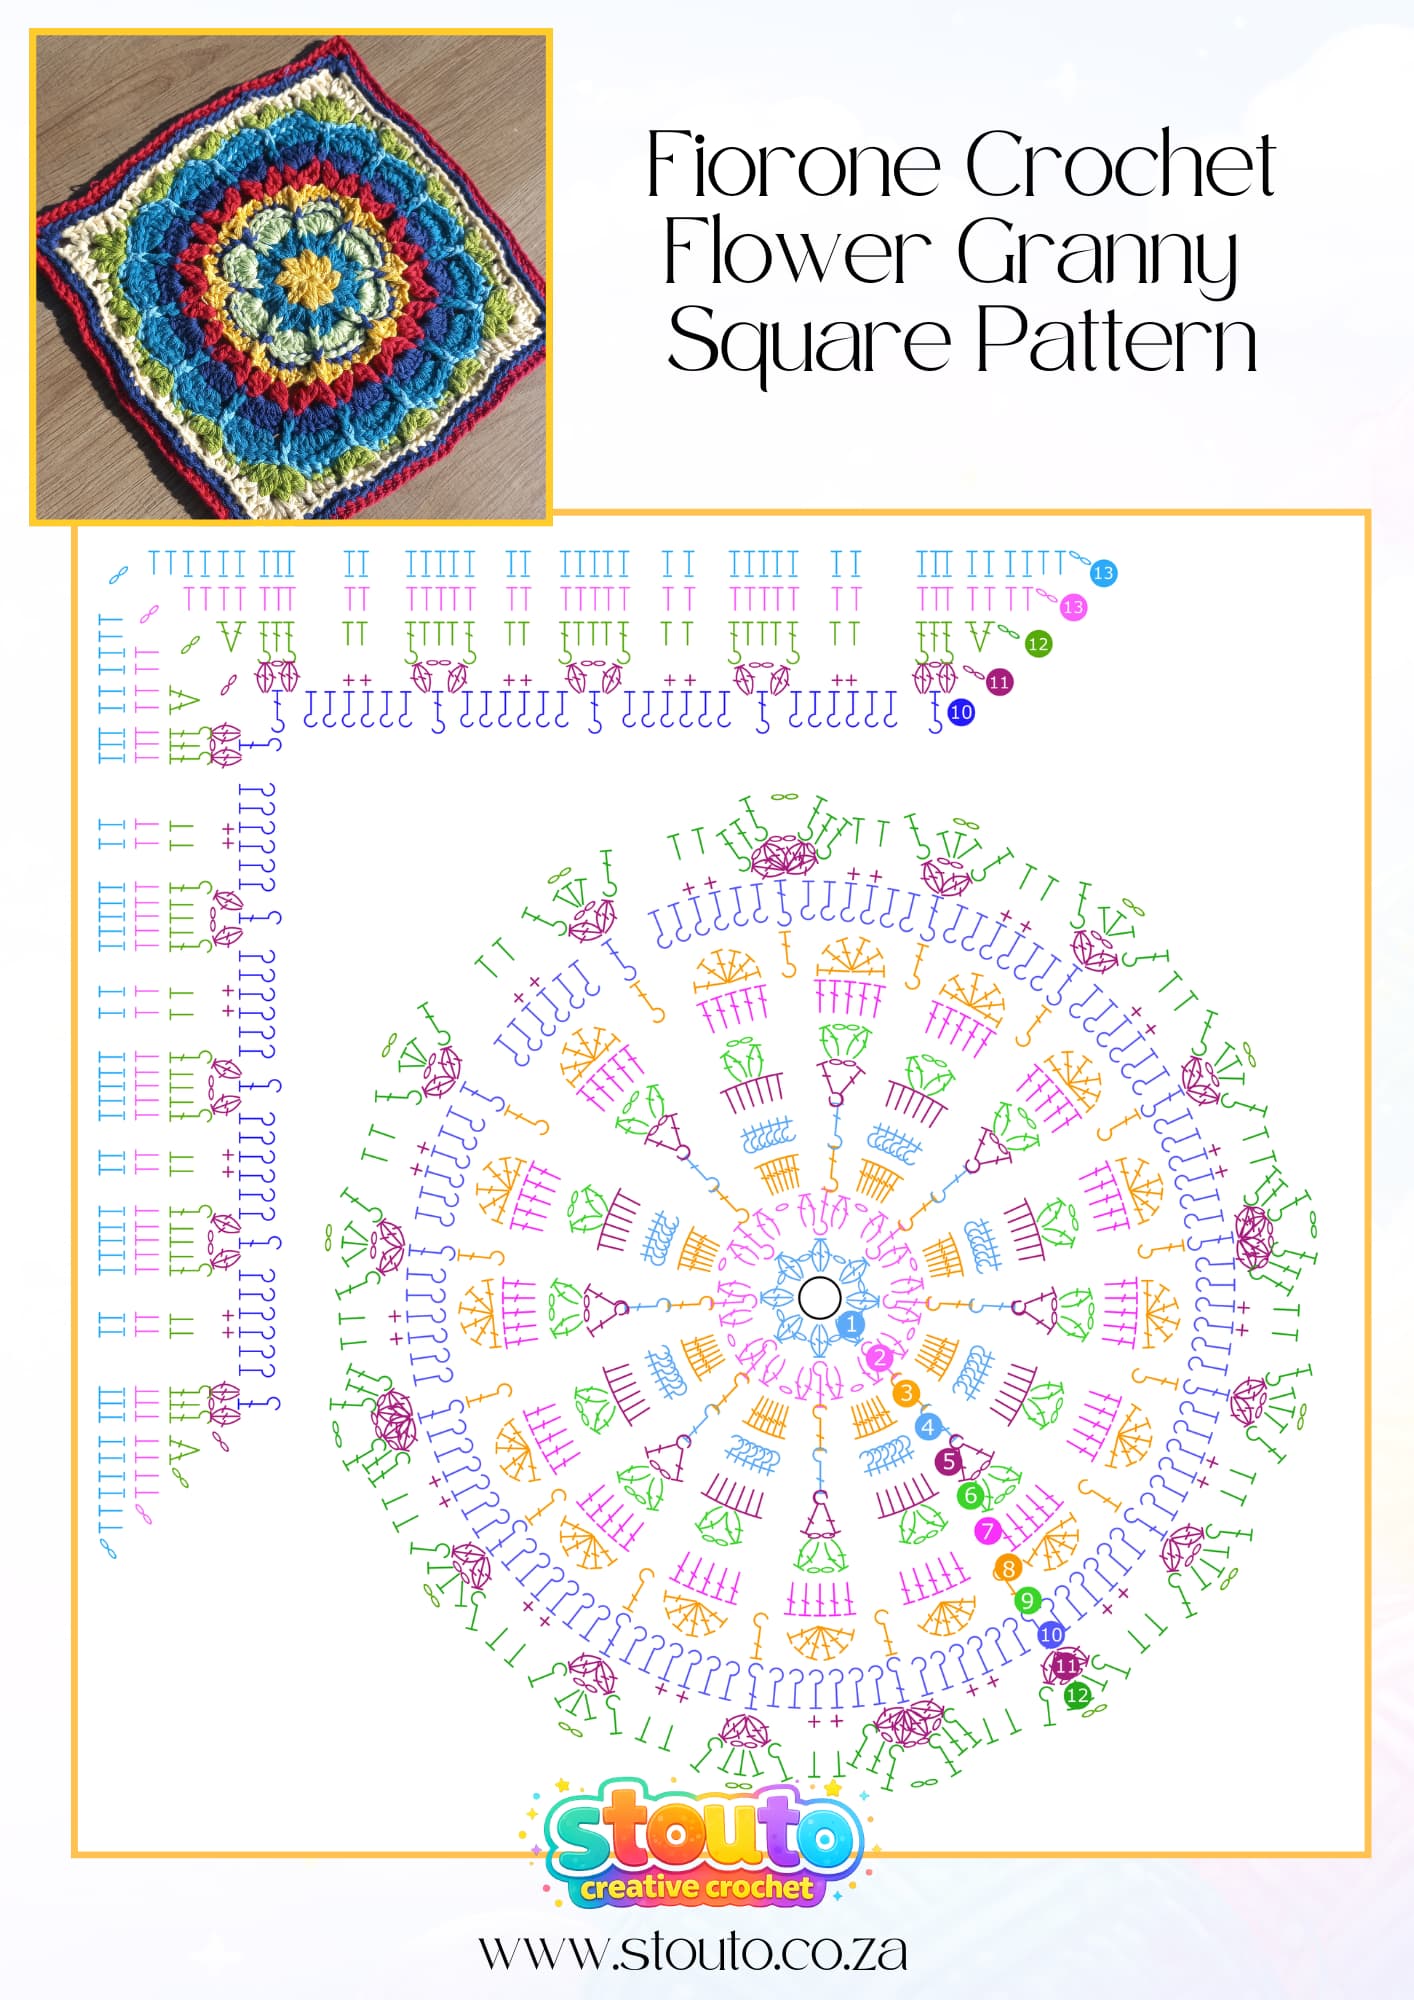
Pattern Diagram
Share, Save or Pin this free stitch diagram.
STITCHES
Quick Stitch Guide
.
US Stitch Terminology : Abbreviations
-
Back Loop Only - BLO
-
Back Post Double Crochet - bpdc
-
Back Post Half Double Crochet - bphdc
-
Chain Space - ch-sp
-
Cluster - cl
-
Double Crochet - dc
-
Front Post Double Crochet - fpdc
-
Half Double Crochet - hdc
-
Magic Ring - MR
-
Repeat from * - rep from *
-
Single Crochet - sc
-
Shell Stitch - sh
-
Stitches - sts
-
V Stitch - v st
-
Yarn Over - yo
All stitch instructions are available in both US Crochet Terminology and UK Crochet Terminology, making it easy to follow along using the terms you are most familiar with.
If you are new to any of the stitches used in this pattern, we recommend reviewing the relevant stitch guide before starting. Each guide includes step-by-step instructions, helpful tips, and stitch terminology conversions where applicable.
Take your time, practice any unfamiliar stitches, and most importantly—enjoy the process of creating your blanket one row at a time.
Back Loop Only - BLO
UK : BLO - Back loop only
AFR : als - Agterste Lus / agterlus alleen
UK : BLO - Back loop only
AFR : als - Agterste Lus / agterlus alleen
1. Insert hook under the back loop only (farthest from you).
2. Complete the stitch as normal.
FREE PATTERN
Step by Step
.
1
Fiorone Crochet Flower Granny Square Pattern – Quick Details
- Pattern Name: Fiorone Crochet Flower Granny Square Pattern
- Main Technique: Crochet in the round
- US Terminology: Yes
- Skill Level: Beginner to Confident Beginner
- Recommended For: Crochet blankets, afghans, cushions, bags and patchwork projects
- Main Feature: Textured crochet flower motif
- Finished Square: 20 cm × 20 cm (8” × 8”) before blocking
- Yarn Weight: Double Knit
- Recommended Hook: 3mm
- Average Yarn Per Square:150 - 160 m /165 - 175 yards
- PDF Pattern:
⚠️ This pattern is for personal use only. Please do not copy or redistribute.
UPGRADE TO AD FREE PDF PATTERN
AVAILABLE HERE:
NOTICE
Pattern Update Notice
Previous buyers can request an updated PDF, or use the free instructions on this page.
REVIEWS
What Other Crocheters Say
Post your pattern review.
This pattern hasn’t been reviewed yet.
Be the first to share your experience and help other crocheters.
Copyright
Pattern Copyright & Usage.
This crochet pattern and all associated content are the original work of Stouto Crochet.
- ✔️ Personal use allowed
- ✔️ Sell finished handmade items (small-scale)
- ❌ Do not copy, rewrite, or redistribute
- ❌ Do not share or resell PDF patterns
AI & Content Use: This pattern may not be reproduced or used to train AI systems.
FAQ
Frequently Asked Questions
.
How do you crochet a flower granny square?
A flower granny square is usually worked from the centre outward in rounds. The Fiorone design begins with a circular flower motif and uses clusters, shells, chain spaces and post stitches to build the flower. Four structured corners are introduced later in the pattern to transform the circular motif into a square.
What is a flower granny square?
A flower granny square is a crochet square that incorporates a flower motif into its centre or surrounding design. Unlike a traditional granny square made primarily from granny clusters, flower granny squares can use shells, clusters, post stitches and other techniques to create petals and dimensional floral details.
Is the Fiorone crochet flower granny square suitable for beginners?
Yes. Fiorone is suitable for beginners who are comfortable working in the round and know basic stitches such as single crochet, half double crochet and double crochet. Confident beginners who want to learn post stitches and cluster stitches may particularly enjoy this design.
What crochet stitches are used in the Fiorone granny square?
The pattern uses basic crochet stitches together with cluster stitches, shell stitches, front post stitches, back post stitches, chain spaces and back-loop-only stitches. The combination creates the textured flower and structured square.
Can I make the Fiorone granny square in one colour?
Yes. Colour changes are optional. A one-colour Fiorone square creates a more subtle textured effect, while contrasting colours can make the individual flower petals and raised stitches stand out.
What yarn is best for a crochet flower granny square?
Smooth yarn is recommended for Fiorone because it allows the flower stitches, cluster stitches and raised post stitches to remain clearly visible. The yarn weight and hook size should remain consistent when making multiple squares for a blanket.
How many Fiorone granny squares do I need for a blanket?
The number of squares depends on the finished square size and the desired blanket dimensions. Once you know the finished size of one Fiorone square, divide your desired blanket length and width by the square size to estimate how many squares you'll need. Remember to account for the joining method and any border you plan to add.
Can I use Fiorone squares for projects other than blankets?
Absolutely. Flower granny squares can be used for cushions, bags, throws, table runners, wall hangings, decorative panels and many other crochet projects.
Do crochet flower granny squares need to be blocked?
Blocking is optional, but it can be helpful when making multiple squares. Blocking can help straighten the edges and bring individual squares to a more consistent finished size before joining.
Why are my granny squares different sizes?
Differences in yarn weight, crochet hook size and personal tension can all affect the finished size of a granny square. For a blanket, use the same yarn weight and hook size for every square and try to maintain consistent tension.
How do I join flower granny squares?
Fiorone squares can be joined using your preferred granny-square joining method, including slip-stitch joining, single-crochet joining, whip stitch or a flatter invisible-style join. Choose a method that complements the texture and appearance of your finished blanket.

About the Designer
Hi, I'm Linda, the designer behind Stouto Creative Crochet. I create original crochet patterns inspired by colour, texture, and the joy of handmade crafts.
Each pattern is personally designed, written, tested, and photographed to provide clear instructions and an enjoyable crochet experience. My goal is to help crocheters of all skill levels create beautiful projects they can be proud of.
Discover more crochet patterns, tutorials, and creative resources from Stouto Creative Crochet.